How to deploy an OP Stack rollup with Docker, Popsigner, and Popkins
Overview
OP Stack, the stack behind Optimism, allows you to run rollups that post data to Celestia instead of Ethereum by using op-alt-da. Learn more in the overview of op-alt-da. In this tutorial, you’ll learn how to run an OP stack rollup using:
- Popsigner for key management. Popsigner is a great way to create, manage, and revoke keys, or even export them if you’d like.
- Popkins for deploying contracts and chain setup. Popkins sets up your keys from Popsigner for rollup deployment, deploys your contracts, and gives you the bundle to run your rollup locally.
- Docker for the devops of running your rollup bundle.
In order to get started, you will need a basic understanding of a few components with accounts you will create that make up this stack:
- deployer: Deploys and configures L1 contracts. Needs most ETH for gas.
- batcher: This account submits L2 transaction batches to L1. Needs ongoing ETH.
- proposer: Submits L2 state roots to L1 for withdrawals.
- celestia: This account posts data to Celestia’s Mocha testnet
With these four components and accounts combined, you will be able to run an OP Stack rollup that posts to Celestia for data availability! Let’s get started.
Environment setup
This tutorial has been tested on MacOS and Linux (Ubuntu 24.04).
Before you run OP stack, you’ll need:
- Docker installed and running locally.
- An Ethereum Sepolia RPC endpoint from a provider like Quicknode , Alchemy , or Infura
- A Celestia Mocha testnet RPC and gRPC endpoint from Quicknode for posting and retrieving blobs
That’s it for now! Let’s get everything else set up.
Setting up keys on Popsigner
First, you’ll set up the keys for the batcher, deployer, proposer, and Celestia. This will allow us to deploy the rollup through Popkins and then start it locally, posting blobs to Celestia.
-
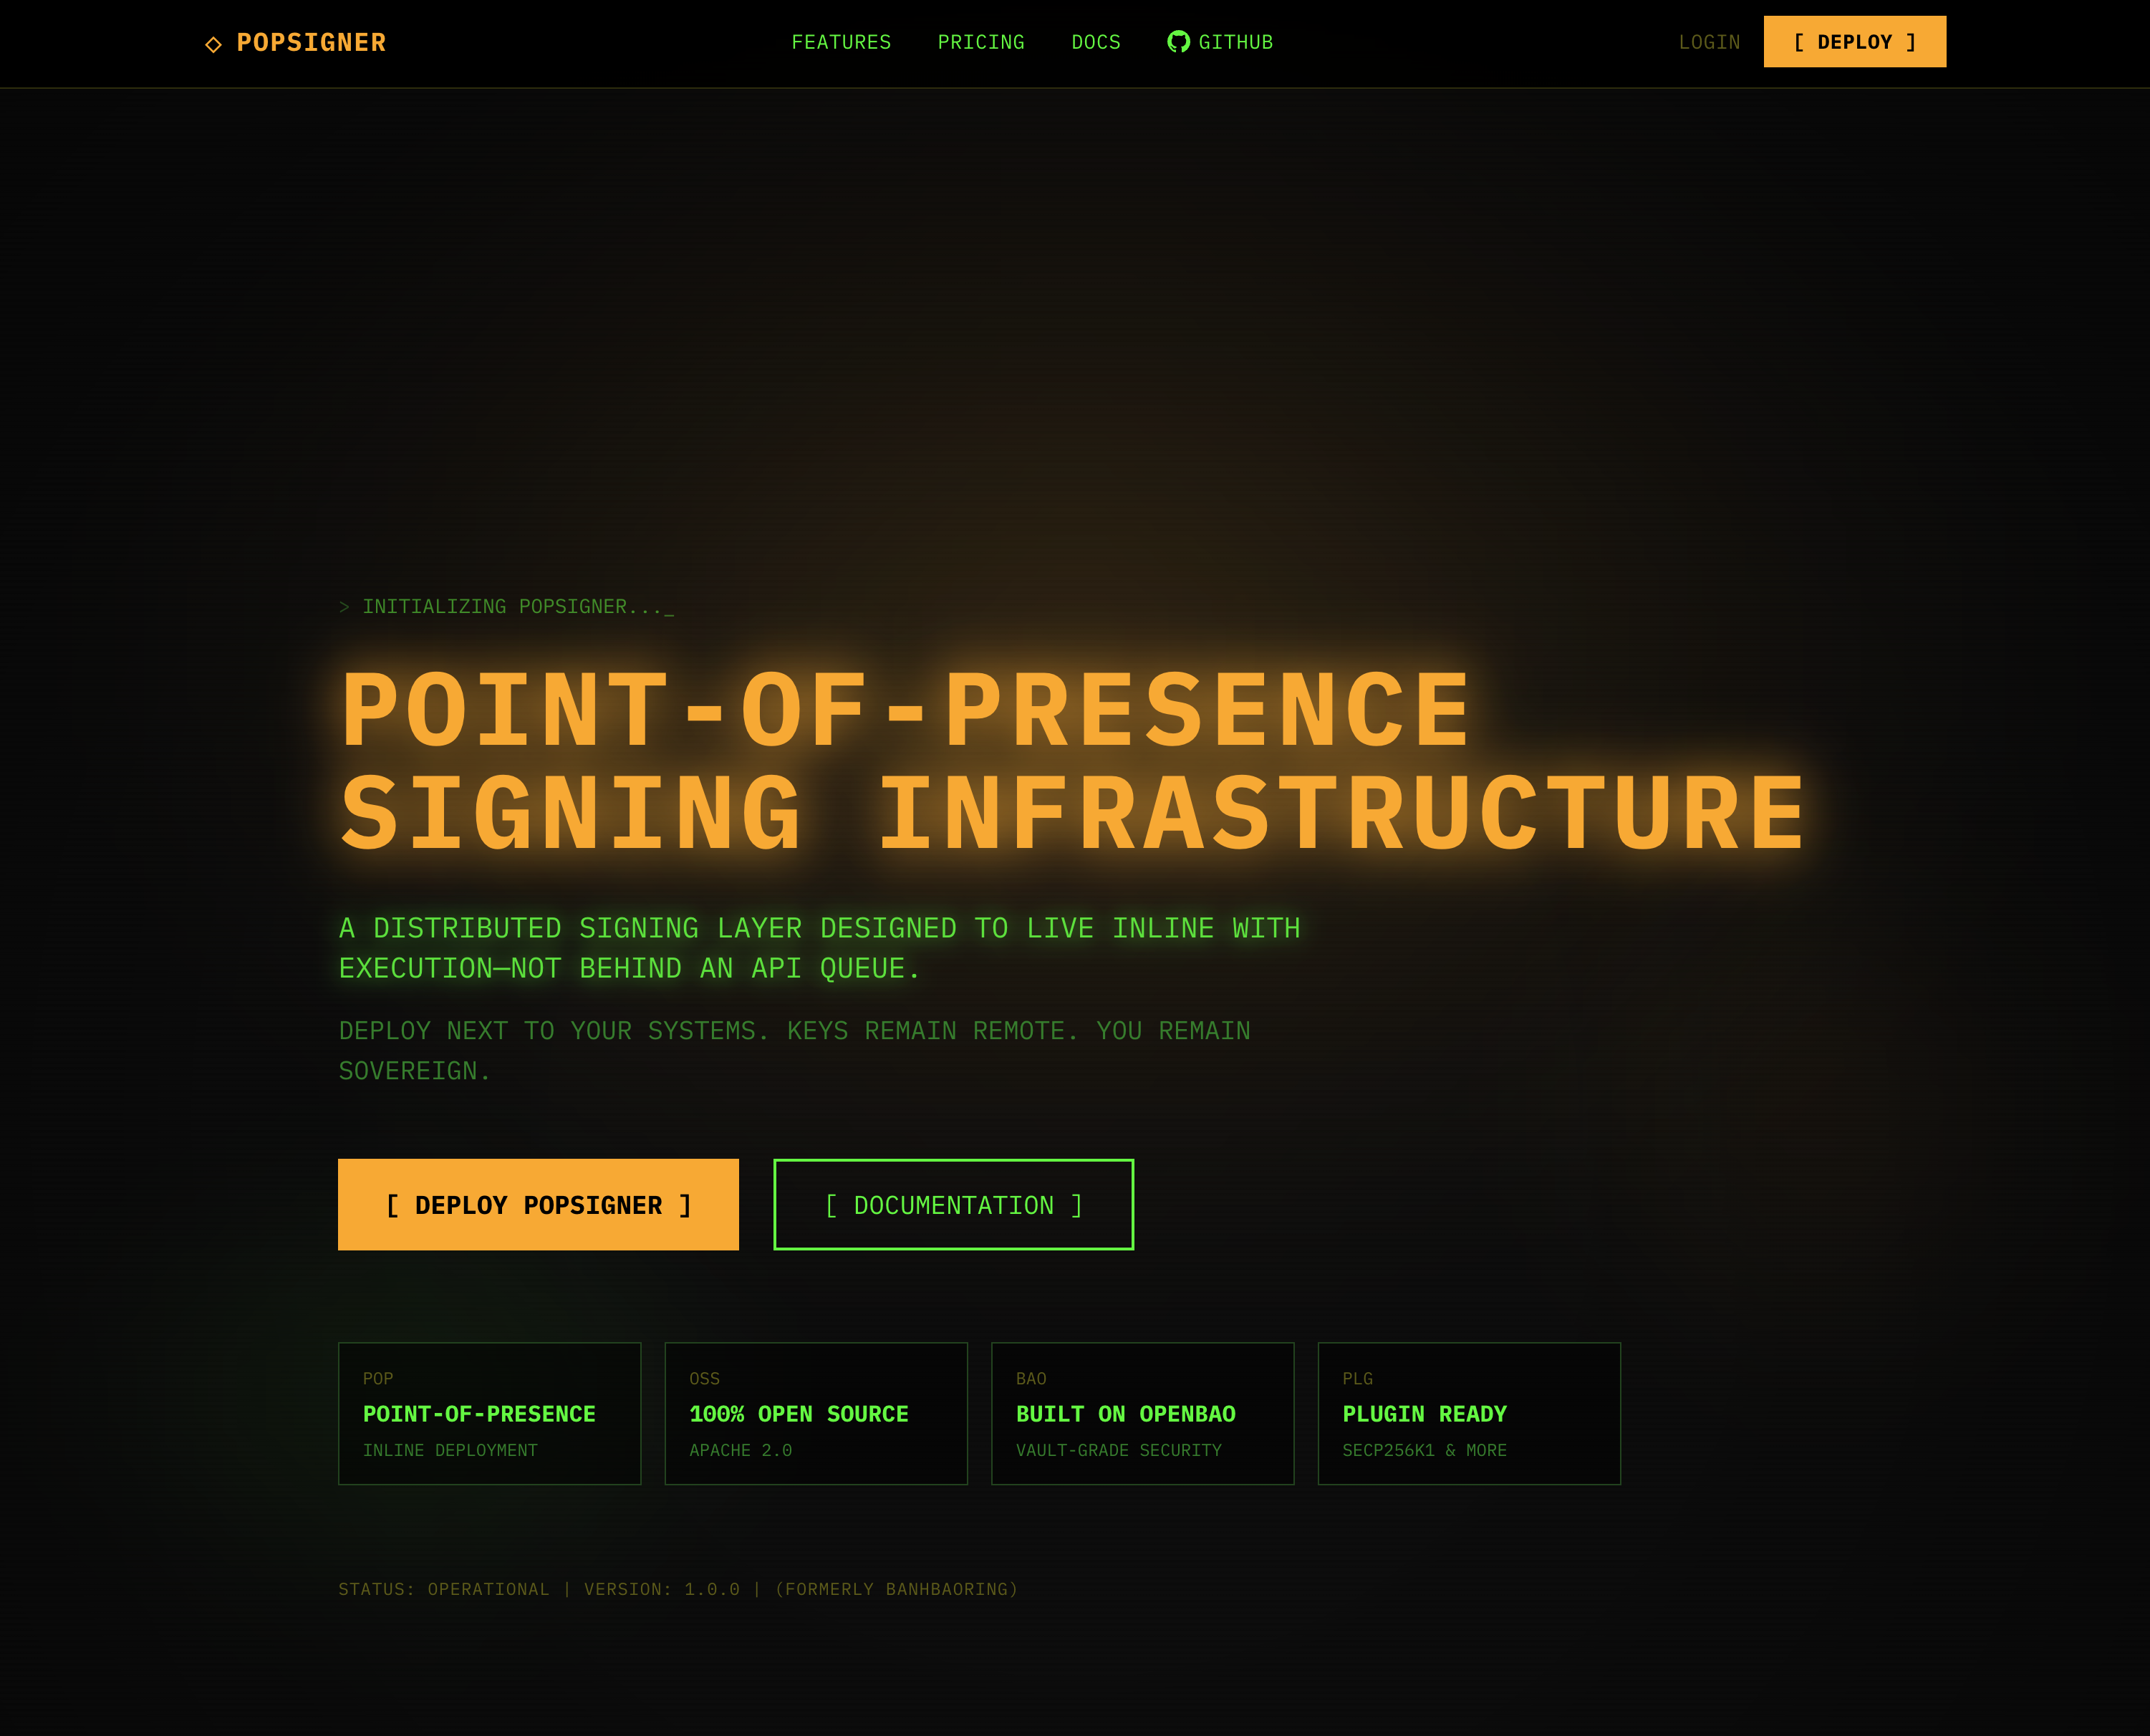
Go to https://popsigner.com/ and make an account by clicking “Deploy”:
-
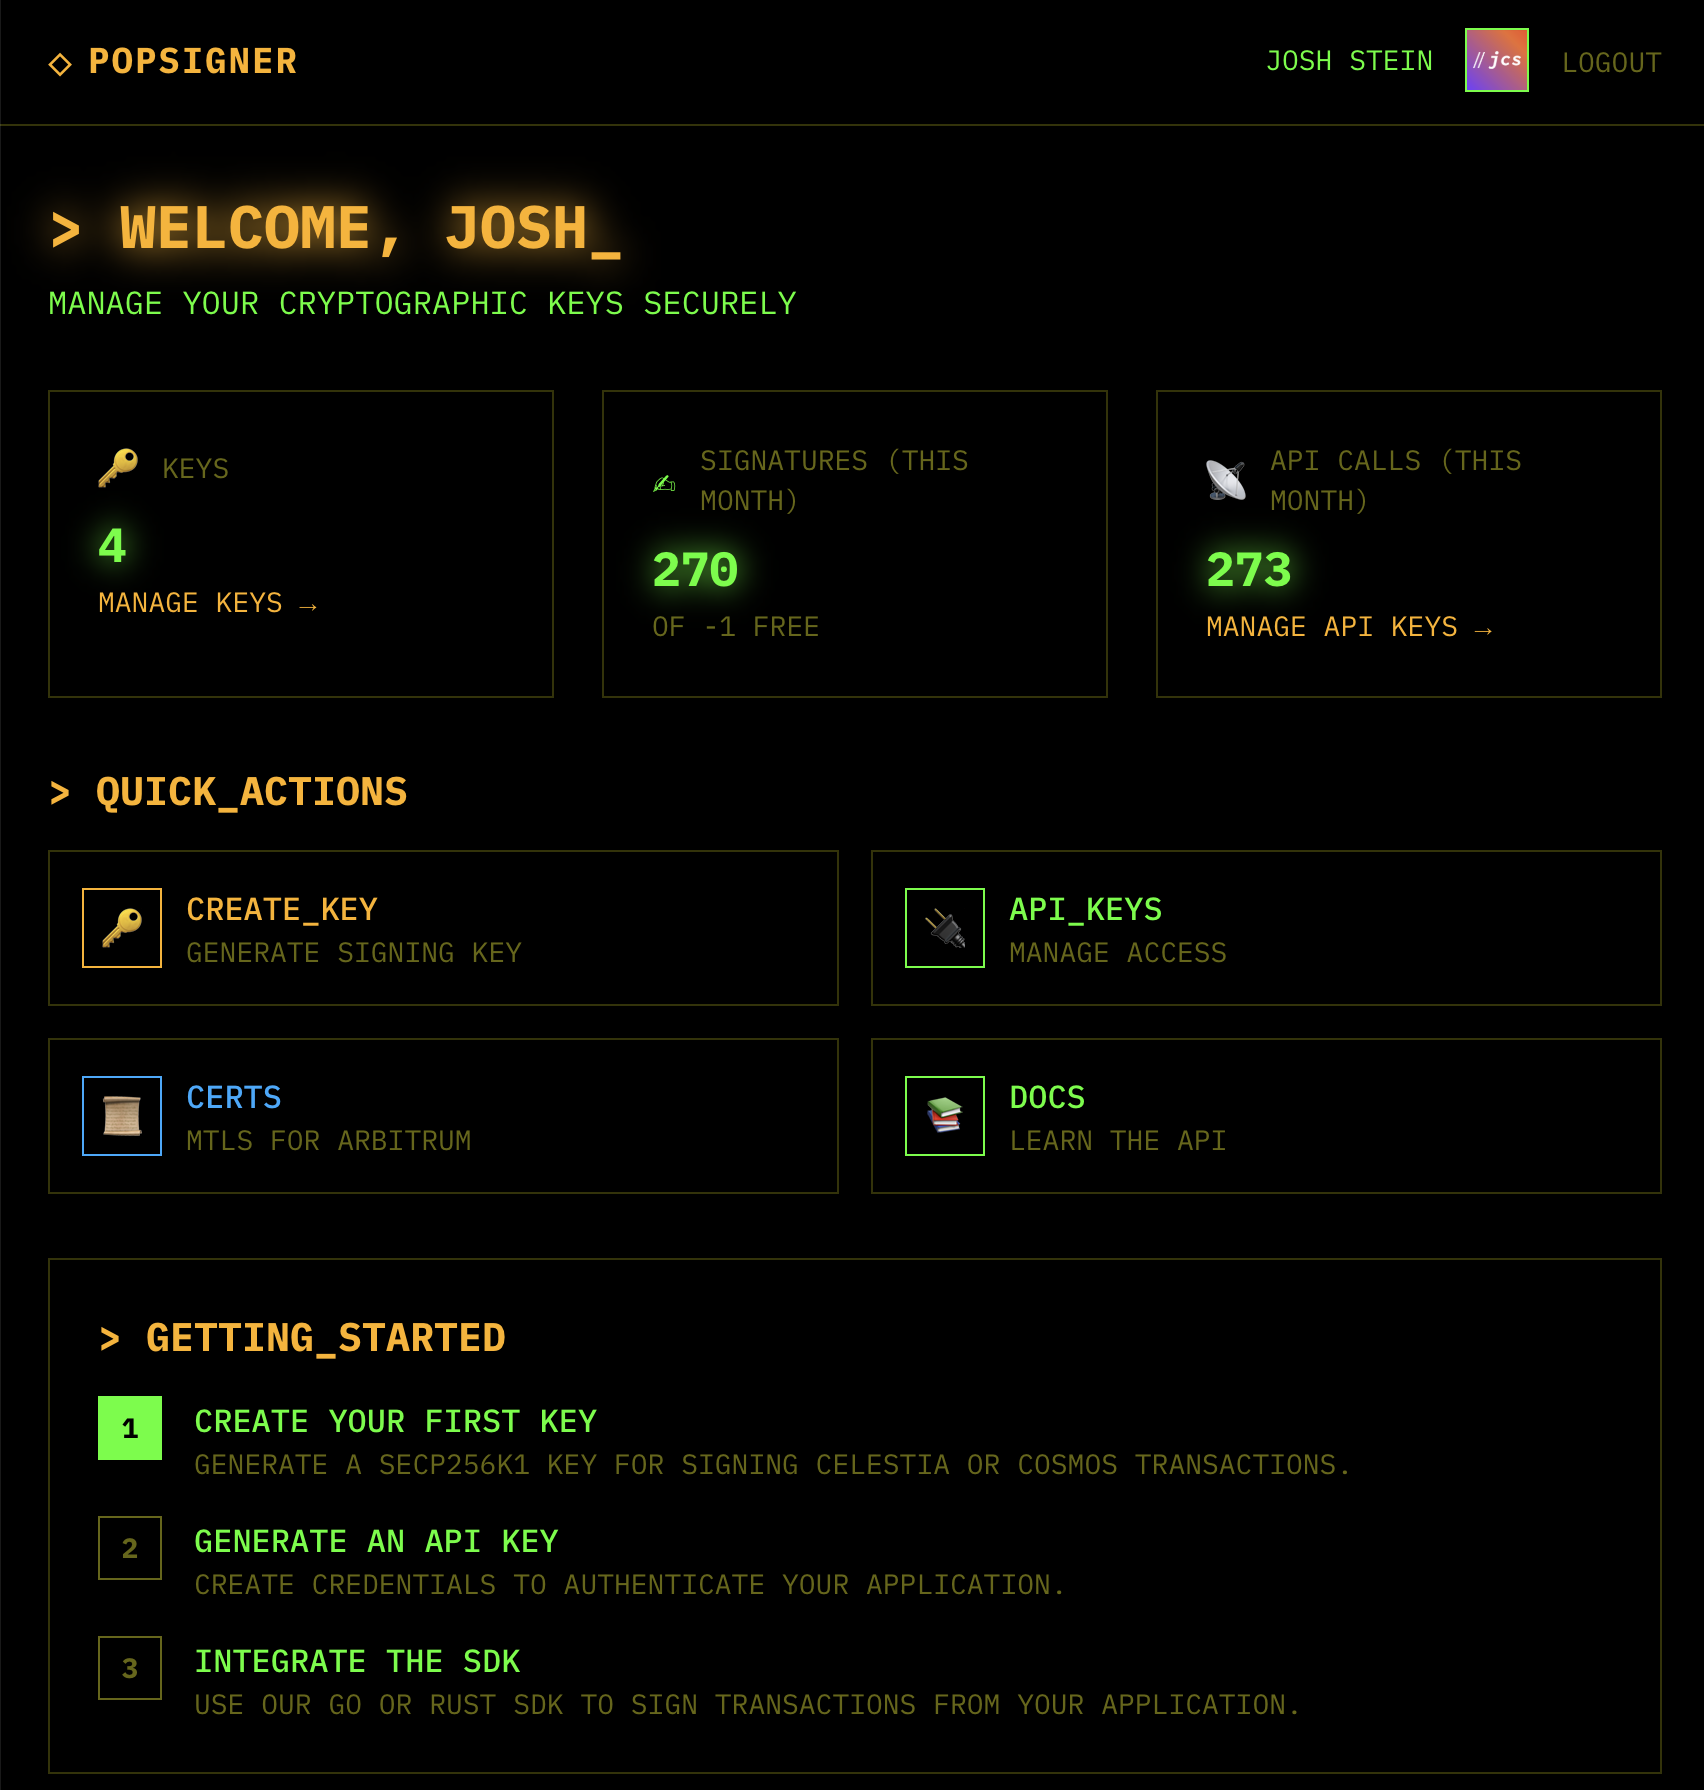
Once you’re logged in, click “CREATE_KEY” in the top right:
-
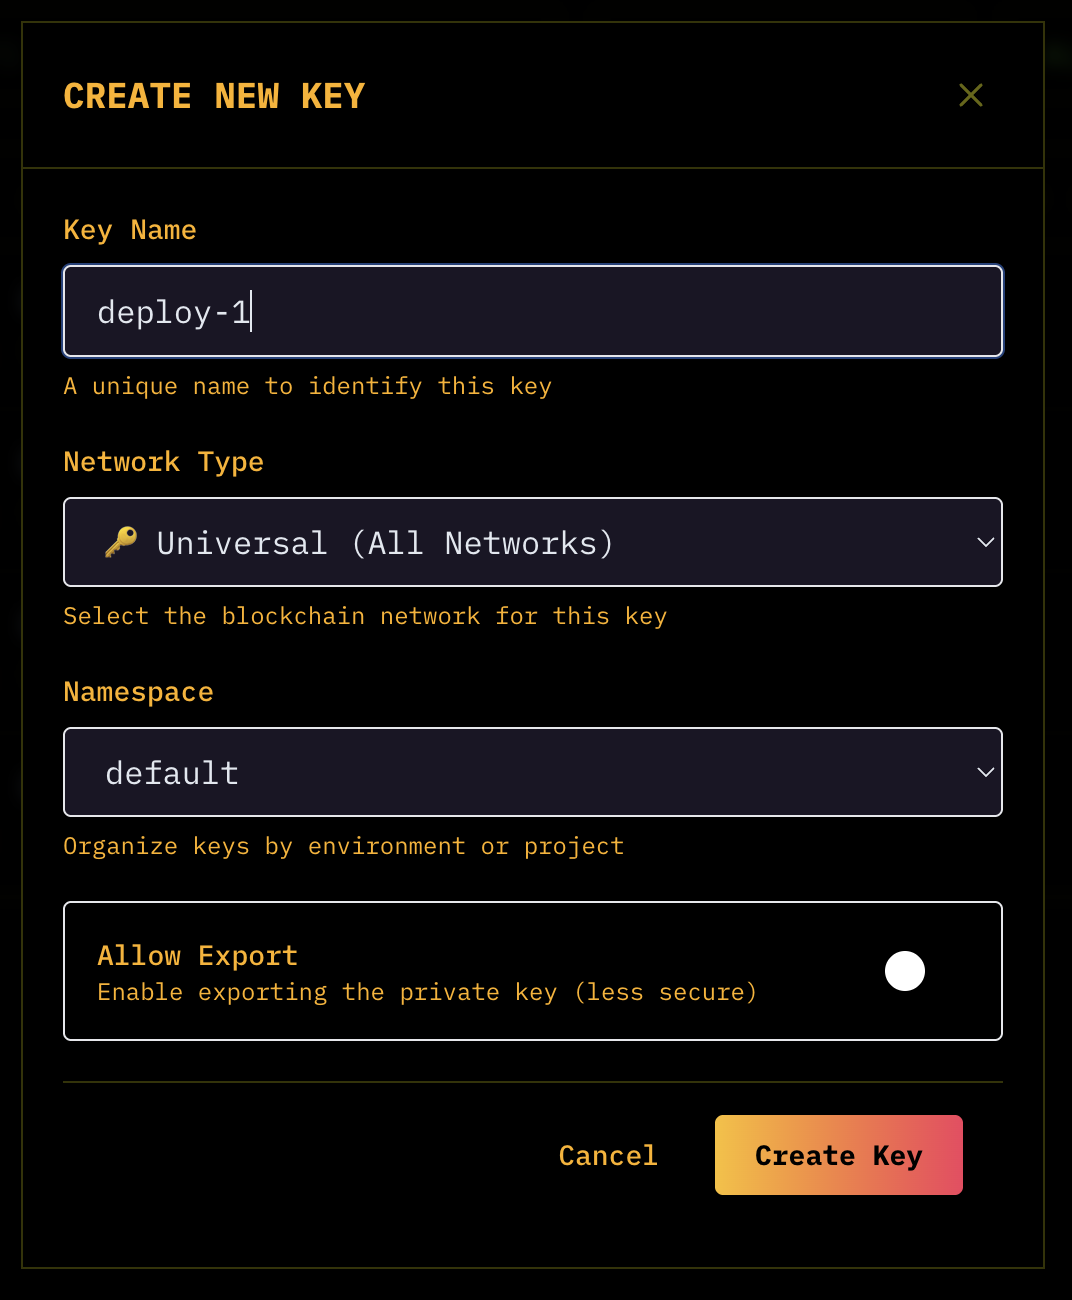
Make 4 keys, all universal for simplicity:
- deploy-1
- batcher-1
- proposer-1
- celestia-1
Funding keys
Now that you’ve set the keys up, you need to fund 3 of the addresses accordingly.
-
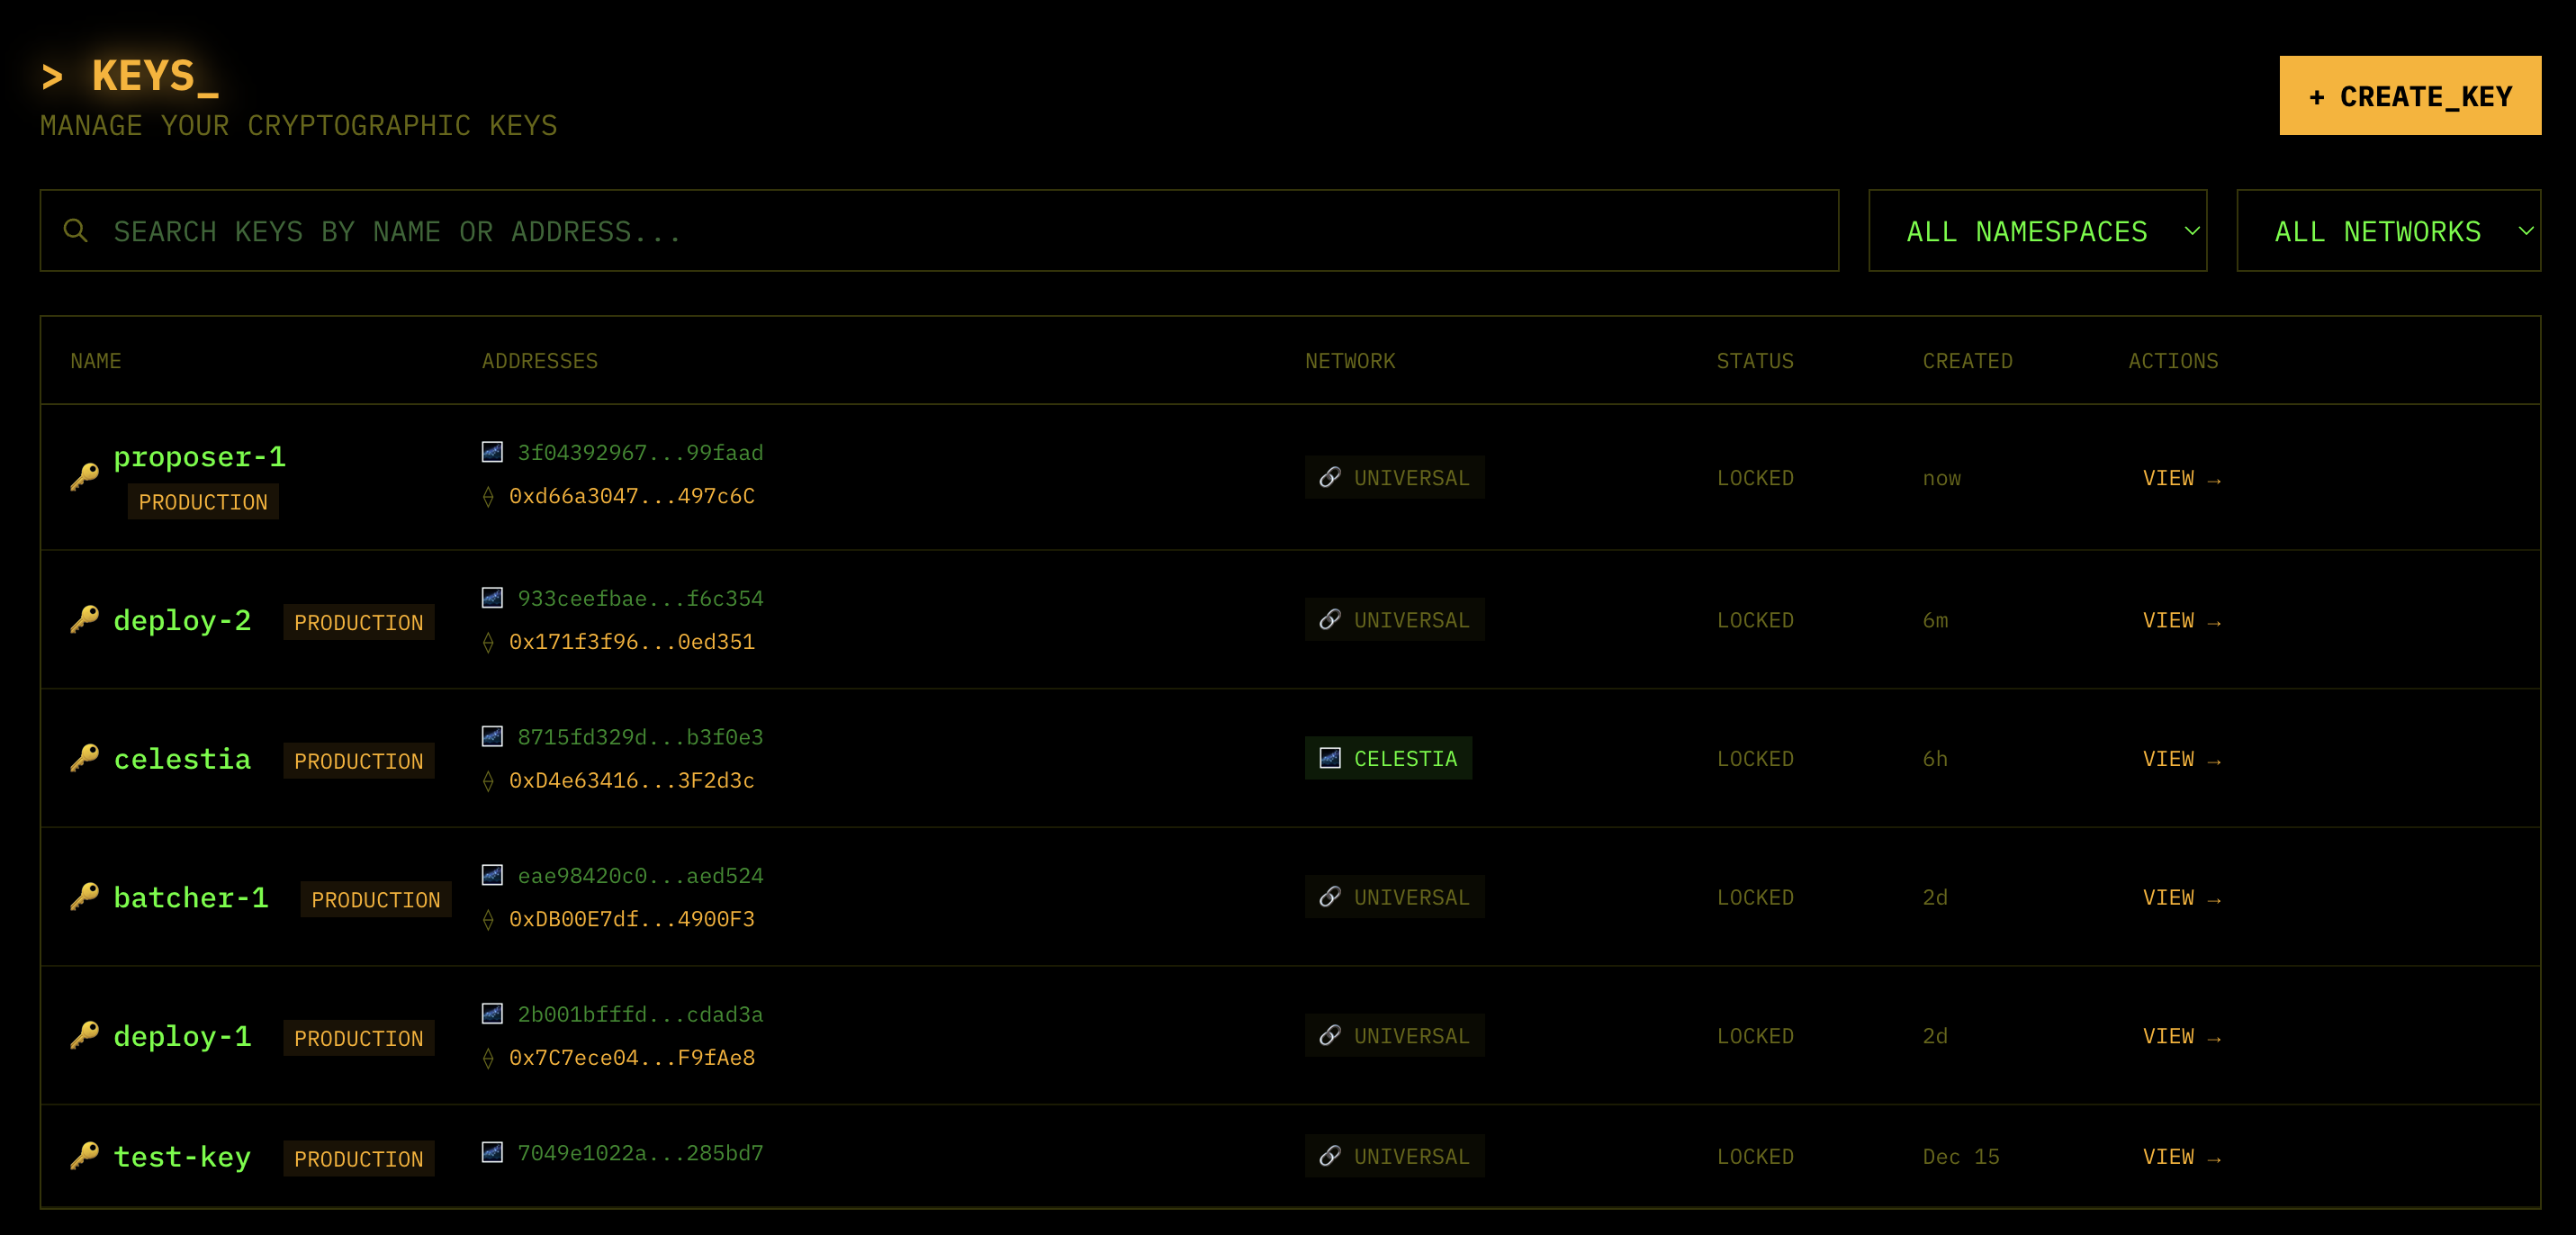
Find the addresses in your dashboard, for Ethereum Sepolia keys, copy the 0x address:
and click “VIEW” to see the Celestia address:
-
Deployer key:
deploy-1(or whatever you named this)- Here’s my example address:
0x7C7ece049b23b68D8c4a087f5252040B61F9fAe8 - Fund the
deploy-1with at least 1 sepoliaETH
- Here’s my example address:
-
Batcher key:
batcher-1- Here’s my example address:
0xDB00E7dfd960bD8C497807f07fa161016a4900F3 - Fund the
batcher-1with at least 0.5 sepoliaETH
- Here’s my example address:
-
Proposer key:
proposer-1- Here’s my example address:
0xd66a3047fcFd200b36F8c8Da1a4B1d4Ddb497c6C - You only need to fund this key if you plan to make withdrawals from the L2 to L1.
- Here’s my example address:
-
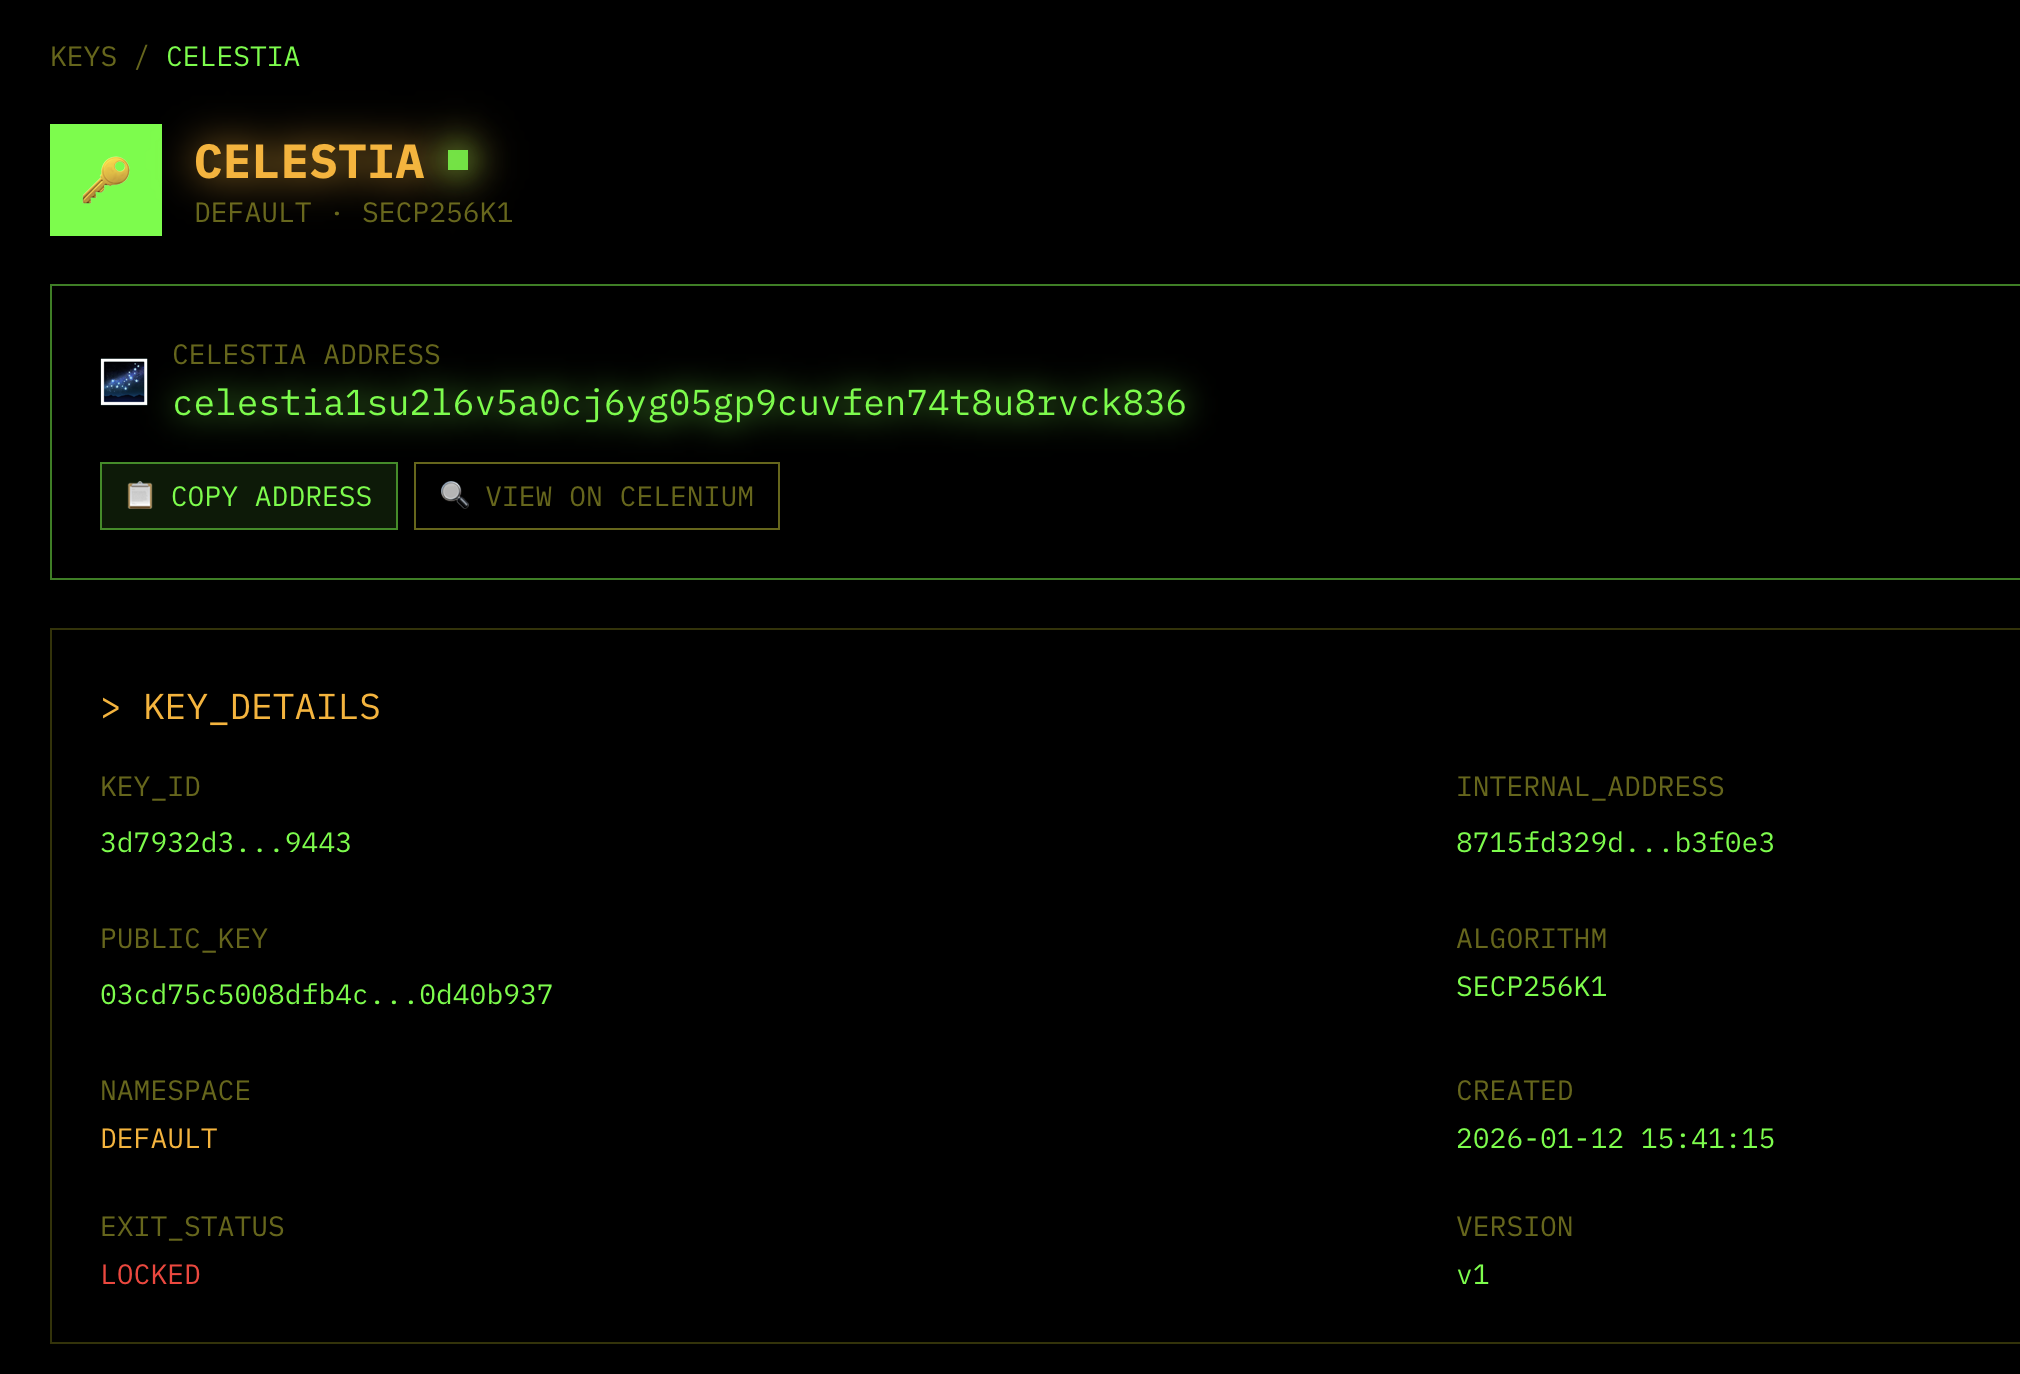
Celestia key:
- Here’s my example address:
celestia1su2l6v5a0cj6yg05gp9cuvfen74t8u8rvck836 - Fund the
celestia-1address with 10 Mocha TIA from the faucet
- Here’s my example address:
Setting up deployment on Popkins
Next, you’re ready to sign in to Popkins and begin your first rollup deployment with an OP Stack chain.
-
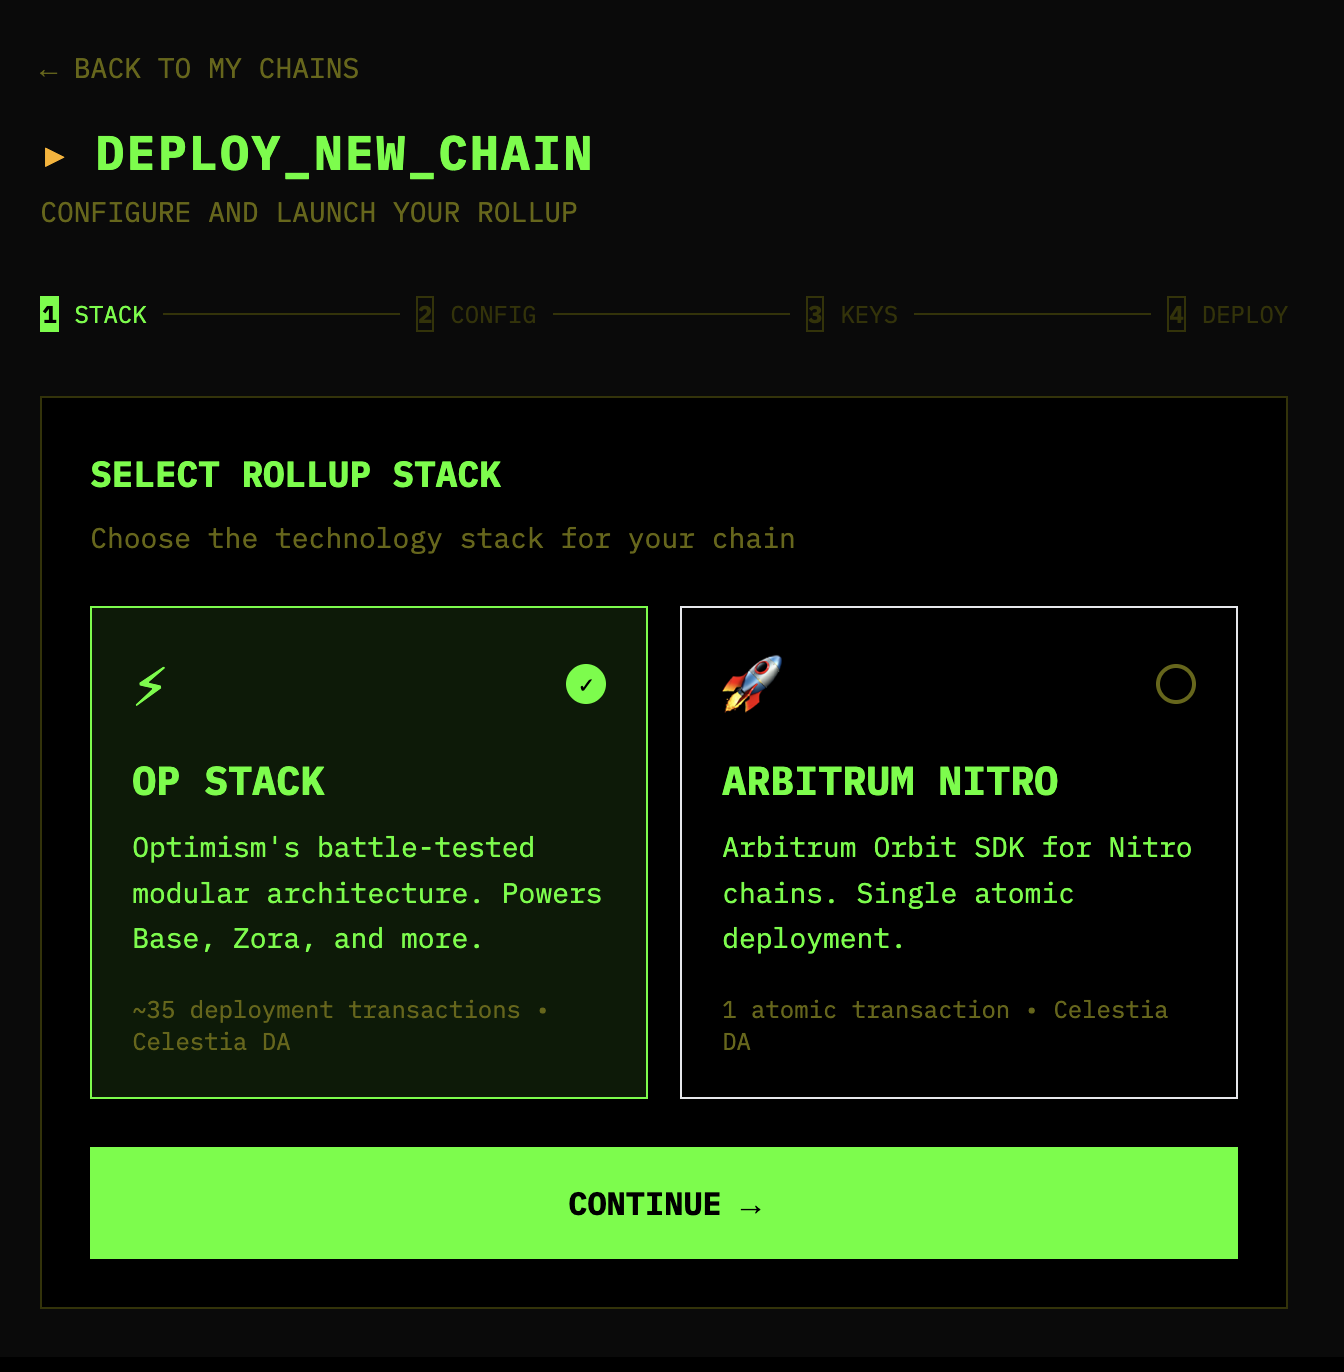
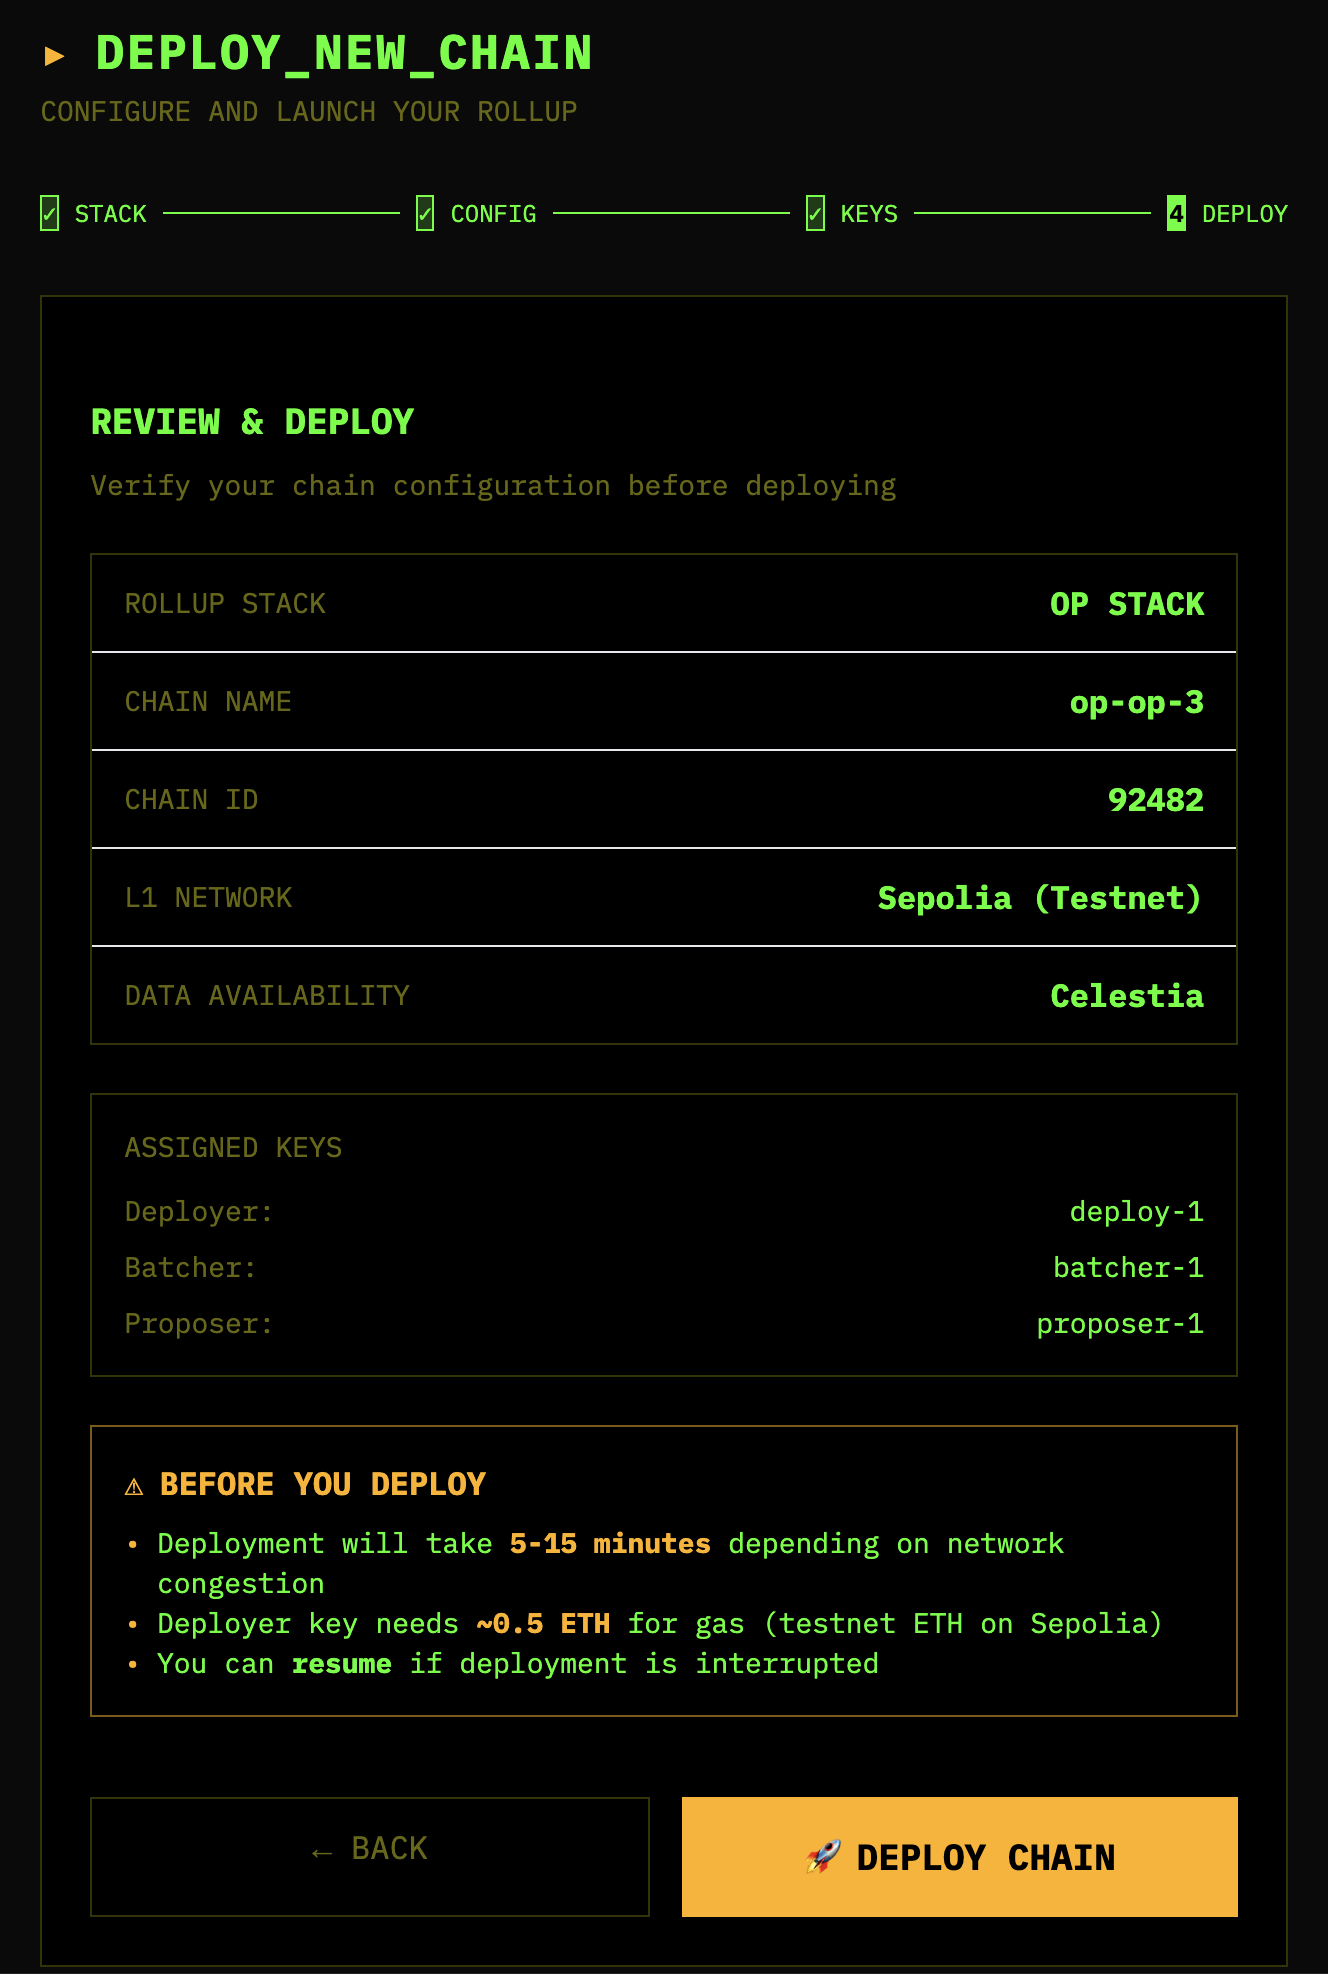
Click “+ NEW CHAIN” button in the top right corner and select OP Stack as the stack.
-
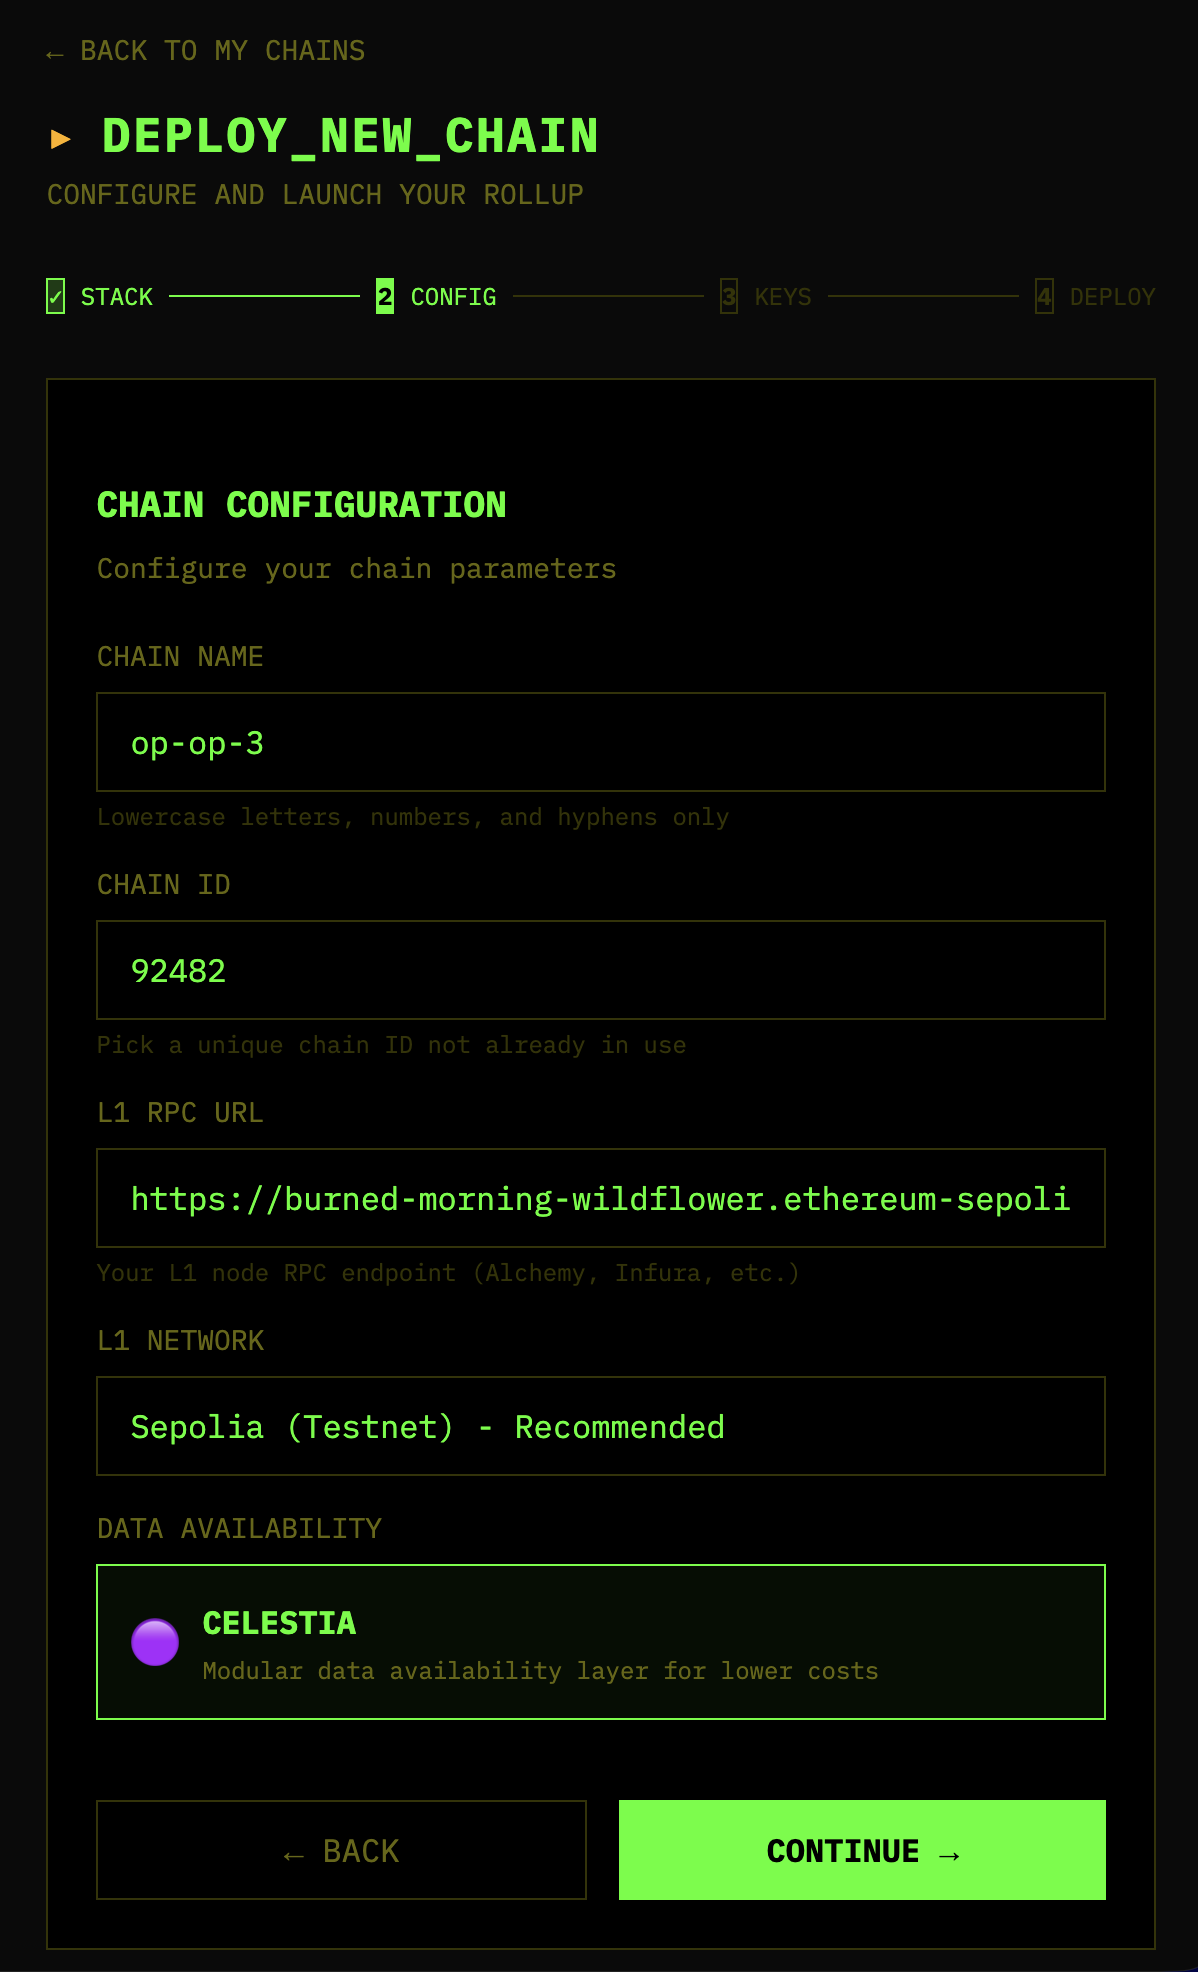
Set up your config for the new chain! Pick a rollup name and ID that you want to use. This is where you’ll also put in the Ethereum Sepolia RPC URL from the environment setup.
-
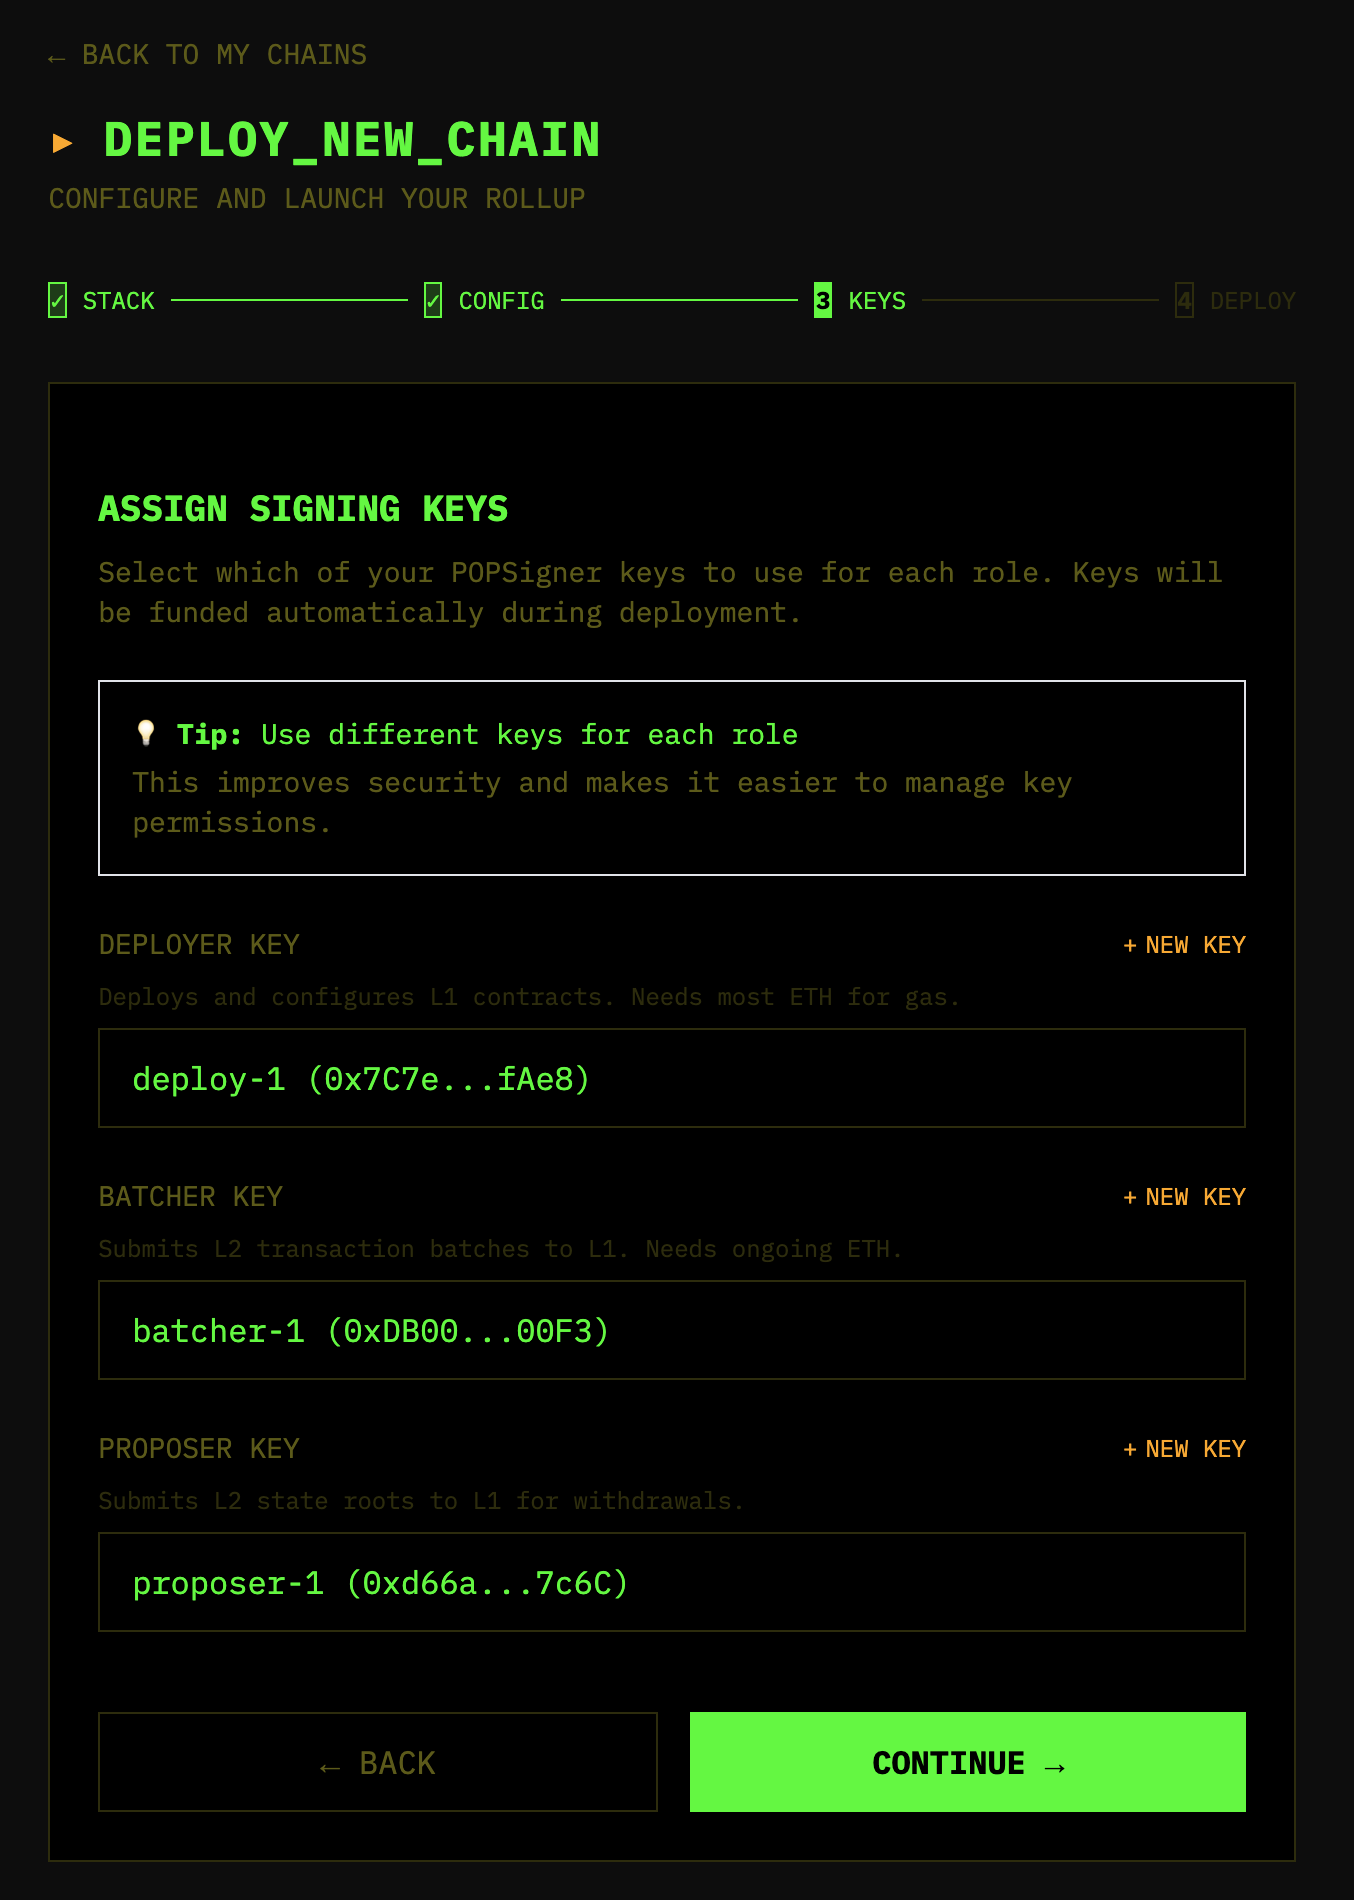
Click “CONTINUE”, then assign keys accordingly:
- Deployer key:
deploy-1(or whatever you setup for this) - Batcher key:
batcher-1 - Proposer key:
proposer-1 - You’ll set the Celestia key up later in the
.env
Then click “CONTINUE” again:
- Deployer key:
-
Once you’ve set up the config, double-check the values before proceeding! Make sure you have 1 sepoliaETH in the deploy key and 0.5 sepoliaETH in the batcher key, and 10 mochaTIA in your Celestia account.
- Click “🚀 DEPLOY CHAIN”
-
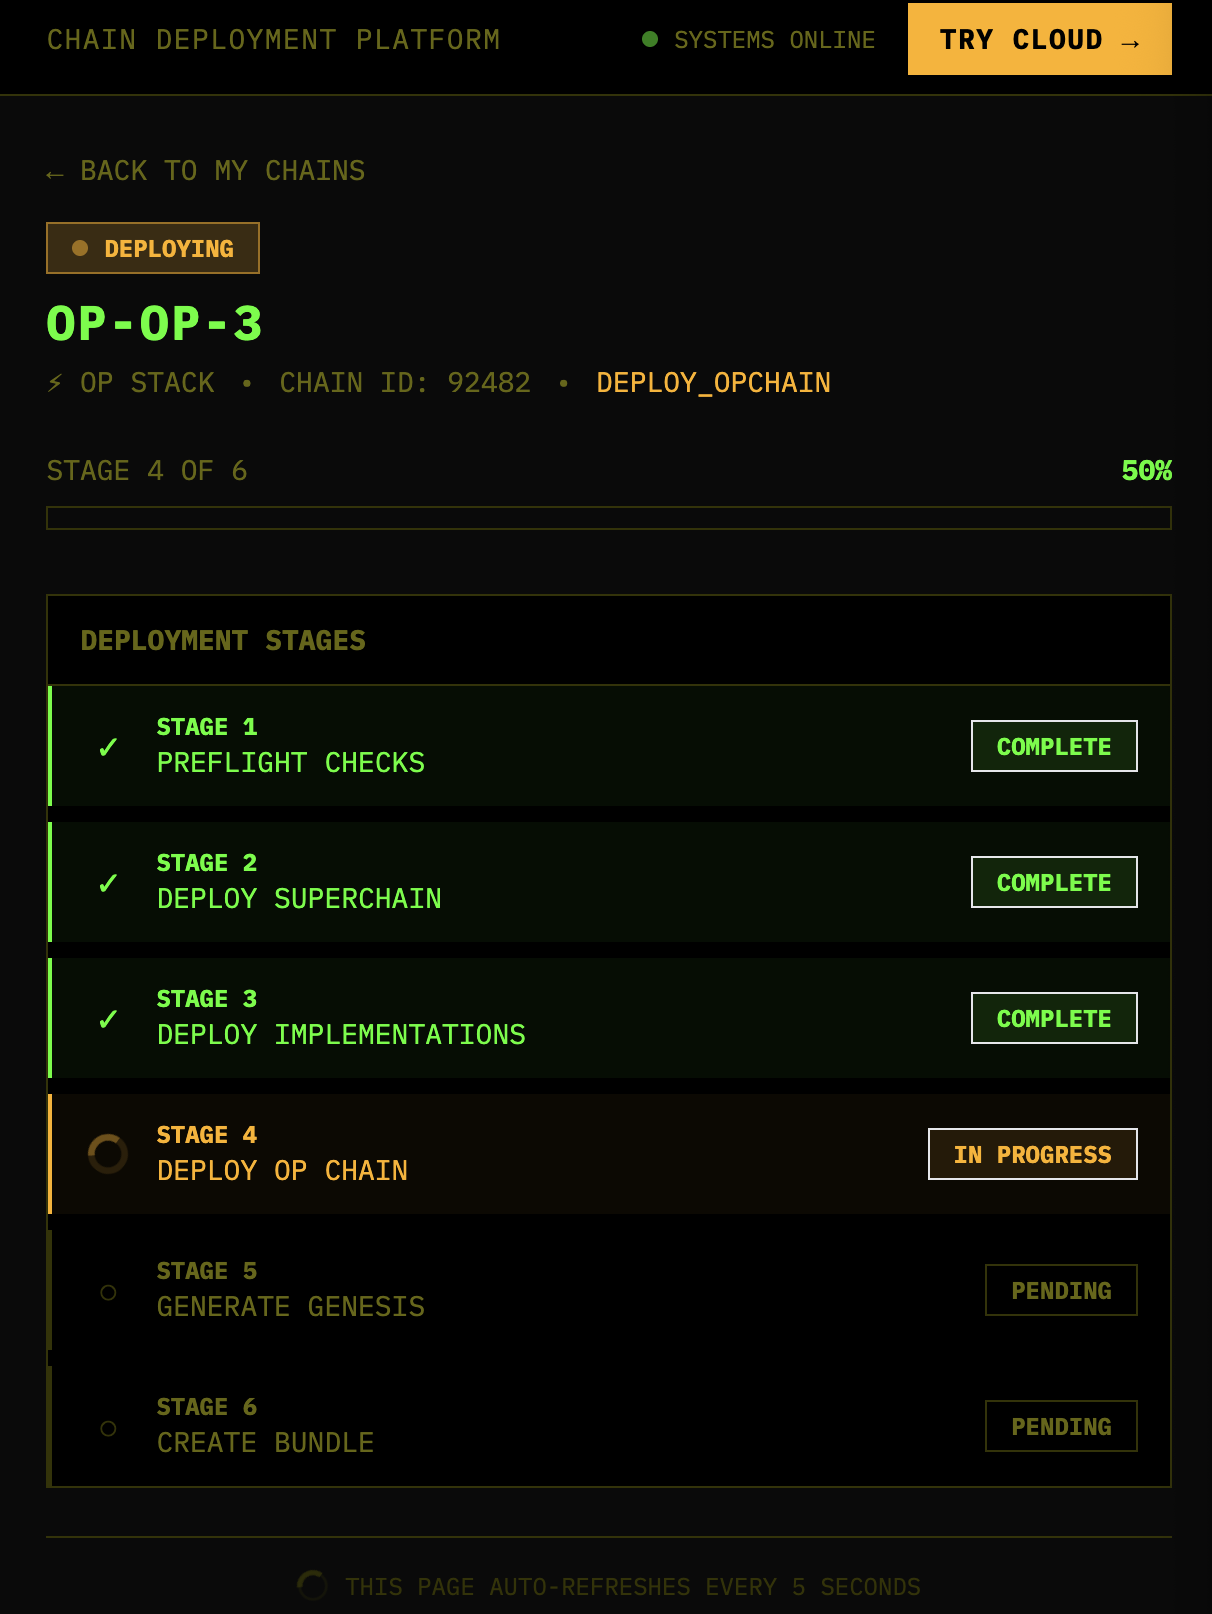
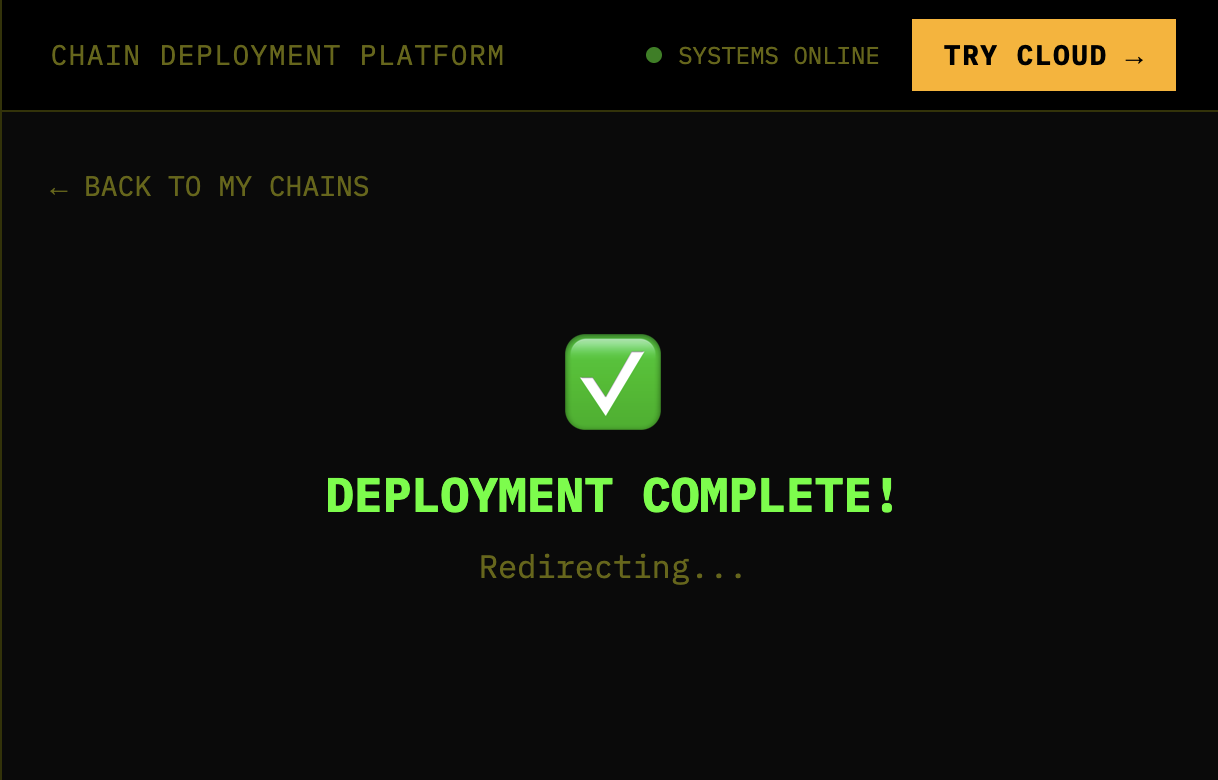
Keep an eye out on the process as it completes. Once it’s finished, you will be able to download the config to run your rollup with Docker compose.
-
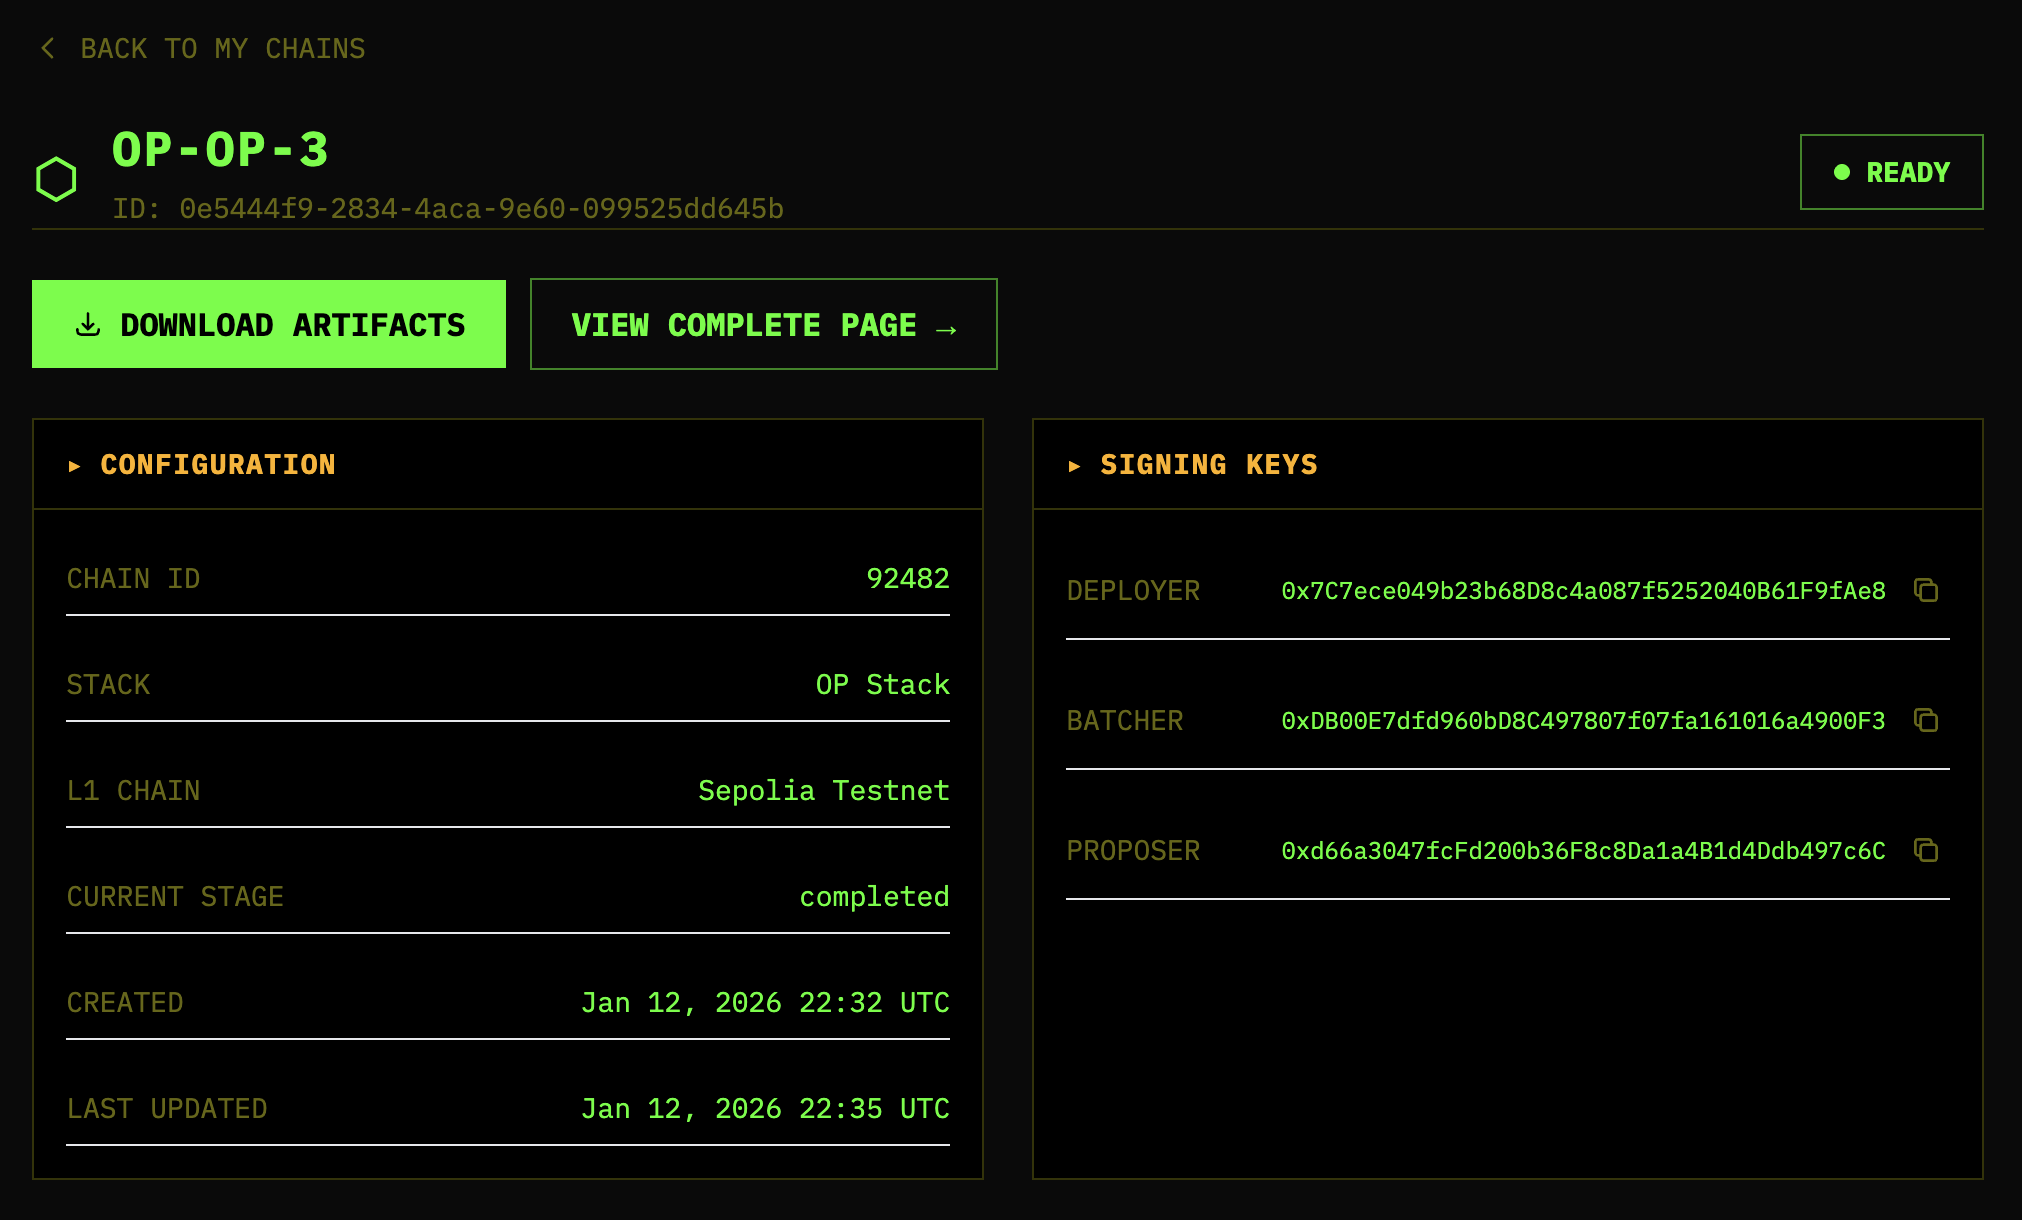
Click “BACK TO MY CHAINS”
-
Go to the chain you just set up. Download the bundle by clicking “DOWNLOAD ARTIFACTS”
Running locally with Docker
Now that you’ve set the rollup up by deploying contracts and downloading the artifacts, you’re ready to run it on your own and start producing blocks! Let’s start by making some config changes.
-
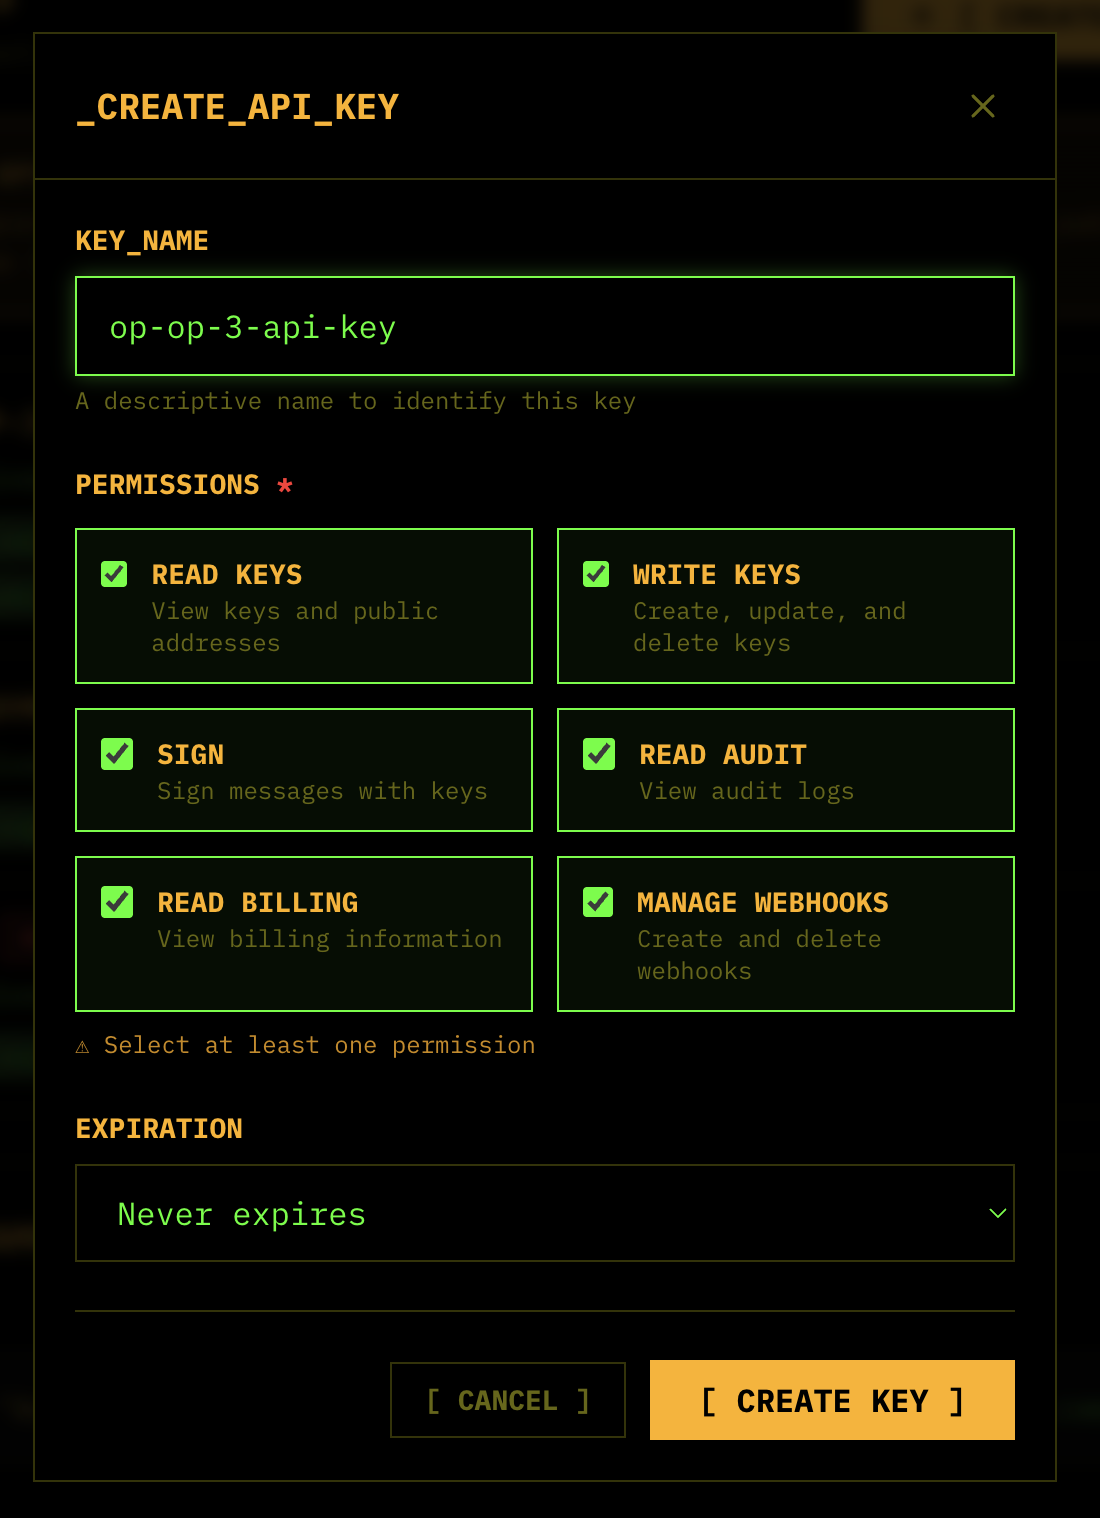
Set up API key on Popsigner.com . This is different than creating a key for a blockchain account. Save this for the next step in your clipboard. You’ll only be able to see it once, for safe security practice.
-
Copy
.env.exampleinto.envto put in your environment variables:-
Fill in the Popsigner API key in your
.envafter copying it in step 1:# Your POPSigner API key (get from dashboard.popsigner.com) POPSIGNER_API_KEY=<REQUIRED>Here’s what mine looks like:
POPSIGNER_API_KEY=bbr_live_7Kp3xM9nR2bQ4sL8wXy6Zv1a -
Next, fill in the Celestia information:
-
To find your Key ID, go to the Celestia key in Popsigner, click “View”, and copy the “KEY_ID”:
# Your Celestia key ID from POPSigner (UUID format)
CELESTIA_KEY_ID=<your-celestia-key-uuid>
Here’s what mine looks like:
CELESTIA_KEY_ID=7f4a8c21-b9e3-4d6e-ac52-1e8f9d3c7b65 -
For the bridge/light node RPC, use Quicknode:
# Celestia Bridge/Light Node RPC (for reading blobs)
# Example: https://your-provider.celestia-mocha.quiknode.pro/your-token/
CELESTIA_BRIDGE_ADDR=<REQUIRED>
CELESTIA_BRIDGE_AUTH_TOKEN=
Here’s what mine looks like:
CELESTIA_BRIDGE_ADDR=https://delicate-sleek-lambo.celestia-mocha.quiknode.pro/8d7f3e5a9b2c4f1e6d8c9a5b7e4f2c1a6d3b9e5f/ CELESTIA_BRIDGE_AUTH_TOKEN= -
For the core gRPC, use the same Quicknode endpoint, constructed slightly differently — no
https://, add port 9090:# Celestia Core gRPC (for submitting blobs) # Example: your-provider.celestia-mocha.quiknode.pro:9090 CELESTIA_GRPC_ADDR=<REQUIRED> CELESTIA_GRPC_AUTH_TOKEN=<your-token-if-required>Here’s what mine looks like:
CELESTIA_GRPC_ADDR=delicate-sleek-lambo.celestia-mocha.quiknode.pro:9090 CELESTIA_GRPC_AUTH_TOKEN=8d7f3e5a9b2c4f1e6d8c9a5b7e4f2c1a6d3b9e5f -
Lastly, set the namespace. Celestia namespaces are 29 bytes (58 hex characters). Version 0 namespaces require 18 leading zero bytes (36 hex zeros), leaving 11 bytes (22 hex characters) for your namespace ID:
# Celestia namespace (29 bytes / 58 hex chars) CELESTIA_NAMESPACE=0000000000000000000000000000000000000009d94e20cae97add6d34 -
You can autogenerate a random namespace with:
export CELESTIA_NAMESPACE=$(printf '%036d' 0)$(openssl rand -hex 11) && echo $CELESTIA_NAMESPACE
-
-
Lastly, change the Popsigner RPC URL to:
# POPSigner RPC endpoint (for op-node, op-batcher signing)
POPSIGNER_RPC_URL=https://rpc.popsigner.com
-
-
Open up
config.tomland set the variables accordingly:-
For namespace, update from:
[celestia]
# Celestia namespace (29 bytes / 58 hex chars, version 0 requires 18 leading zero bytes)
namespace = "0x706f7000000000016942"
To this, the same way you did in
.env:[celestia] # Celestia namespace (29 bytes / 58 hex chars, version 0 requires 18 leading zero bytes) namespace = "0000000000000000000000000000000000000009d94e20cae97add6d34" -
For bridge node for reading blobs, update from:
# ------------------------------------------------------------------------------
# Bridge Node (for reading blobs)
# ------------------------------------------------------------------------------
bridge_addr = "${CELESTIA_BRIDGE_ADDR}"
bridge_auth_token = "${CELESTIA_BRIDGE_AUTH_TOKEN}"
bridge_tls_enabled = false
To your Quicknode endpoint, similarly to how you did in
.env:# ------------------------------------------------------------------------------ # Bridge Node (for reading blobs) # ------------------------------------------------------------------------------ bridge_addr = "https://delicate-sleek-lambo.celestia-mocha.quiknode.pro/8d7f3e5a9b2c4f1e6d8c9a5b7e4f2c1a6d3b9e5f/" bridge_auth_token = "" bridge_tls_enabled = true -
For core gRPC node for submitting blobs, update from:
# ------------------------------------------------------------------------------
# Core gRPC (for submitting blobs)
# ------------------------------------------------------------------------------
core_grpc_addr = "${CELESTIA_GRPC_ADDR}"
core_grpc_auth_token = "${CELESTIA_GRPC_AUTH_TOKEN}"
core_grpc_tls_enabled = true
To your Quicknode endpoint, similarly to how you did in
.env:# ------------------------------------------------------------------------------ # Core gRPC (for submitting blobs) # ------------------------------------------------------------------------------ core_grpc_addr = "delicate-sleek-lambo.celestia-mocha.quiknode.pro:9090" core_grpc_auth_token = "8d7f3e5a9b2c4f1e6d8c9a5b7e4f2c1a6d3b9e5f" core_grpc_tls_enabled = true -
For POPSigner configuration update from:
# ------------------------------------------------------------------------------
# POPSigner Configuration
# ------------------------------------------------------------------------------
# Keys remain remote. You remain sovereign.

[celestia.signer.popsigner]
api_key = "${POPSIGNER_API_KEY}"
key_id = "${CELESTIA_KEY_ID}"
base_url = "https://api.popsigner.com/"
To your API key and Key ID for your POPSigner keys, similarly to how you did in
.env:# ------------------------------------------------------------------------------ # POPSigner Configuration # ------------------------------------------------------------------------------ # Keys remain remote. You remain sovereign. [celestia.signer.popsigner] api_key = "bbr_live_7Kp3xM9nR2bQ4sL8wXy6Zv1a" key_id = "7f4a8c21-b9e3-4d6e-ac52-1e8f9d3c7b65" base_url = "https://api.popsigner.com/"
-
-
Now you’re ready to run this with Docker!
-
If you are on ARM/MacOS, update the image in
docker-compose.yamlto:image: rg.nl-ams.scw.cloud/banhbao/op-alt-da:v0.10.1 -
If you are on Linux/AMD64, update the image in
docker-compose.yamlto:image: rg.nl-ams.scw.cloud/banhbao/op-alt-da:v0.10.1-amd64
-
-
Just run
docker-compose upand watch the magic happen 😎-
On Linux, use
docker-compose --env-file .env upto load the.env- Else, you will have many missing variables:
WARNING: The L1_RPC_URL variable is not set. Defaulting to a blank string.
WARNING: The L1_BEACON_URL variable is not set. Defaulting to a blank string.
WARNING: The POPSIGNER_RPC_URL variable is not set. Defaulting to a blank string.
WARNING: The BATCHER_ADDRESS variable is not set. Defaulting to a blank string.
WARNING: The POPSIGNER_API_KEY variable is not set. Defaulting to a blank string.
WARNING: The DISPUTE_GAME_FACTORY_ADDRESS variable is not set. Defaulting to a blank string.
WARNING: The PROPOSER_ADDRESS variable is not set. Defaulting to a blank string.
-
Congratulations! You’re now running your first OP Stack rollup with Celestia for DA.