Local Nitro devnet
This guide will teach you how to spin up a complete local Arbitrum Nitro rollup with Celestia DA for testing.
What pop-deployer does: It spins up a temporary Anvil instance, deploys all Nitro infrastructure contracts (RollupCreator, Bridge, SequencerInbox, Outbox, challenge manager, one-step provers, etc.), creates the rollup via createRollup, deploys WETH for BOLD staking, captures the chain state to a snapshot, then packages everything into a tarball. When you run the bundle, Anvil loads the pre-deployed state instantly - no waiting for contract deployments.
The “Build the bundle generator” and “Generate the pre-deployed bundle” steps will soon be available through the Popkins UI.
Prerequisites
See overview of Popsigner and Popkins.
Option 1: In the UI
Log in to Popkins
Go to https://popkins.popsigner.com and login.
Set up the local chain
New chain
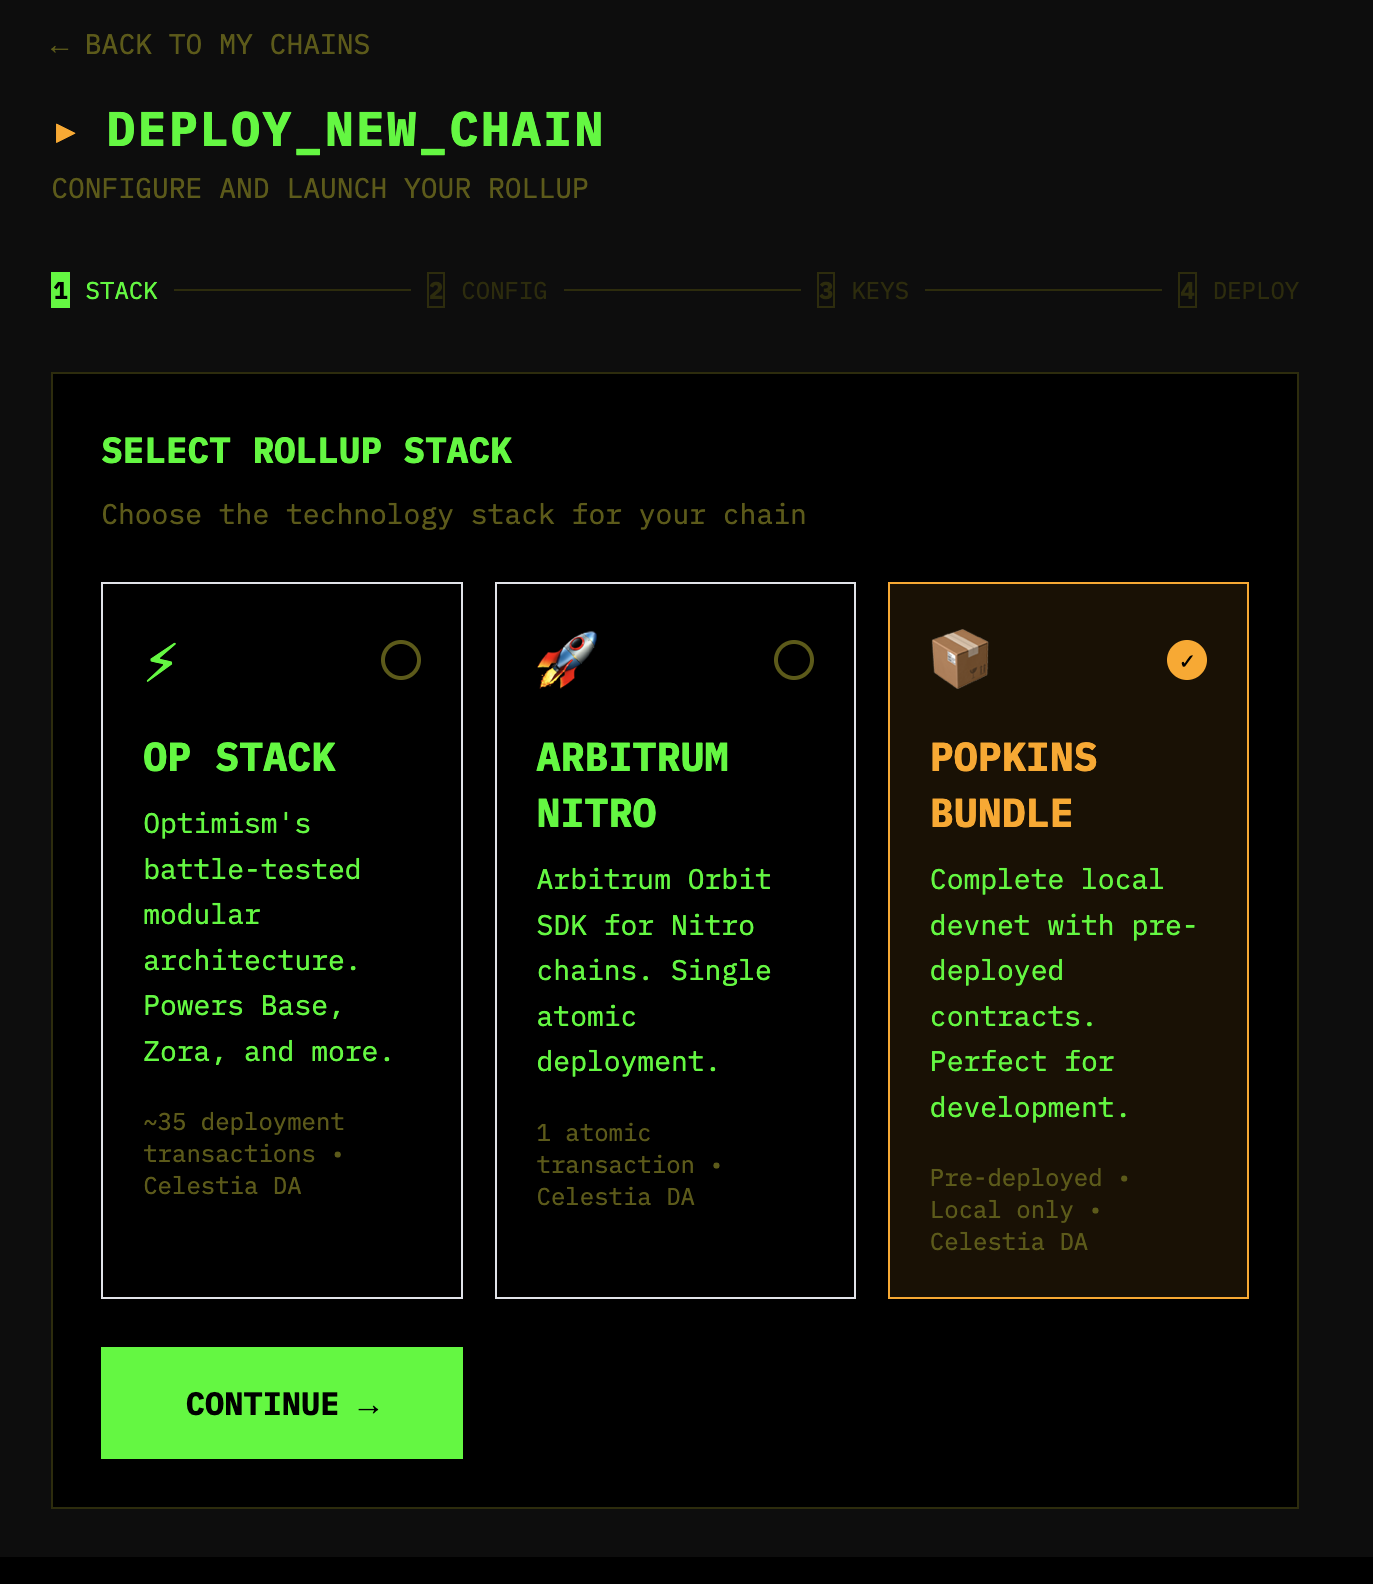
Click ”+ NEW CHAIN” in the top right of the Popkins UI.
Select “POPKINS BUNDLE” and click continue:
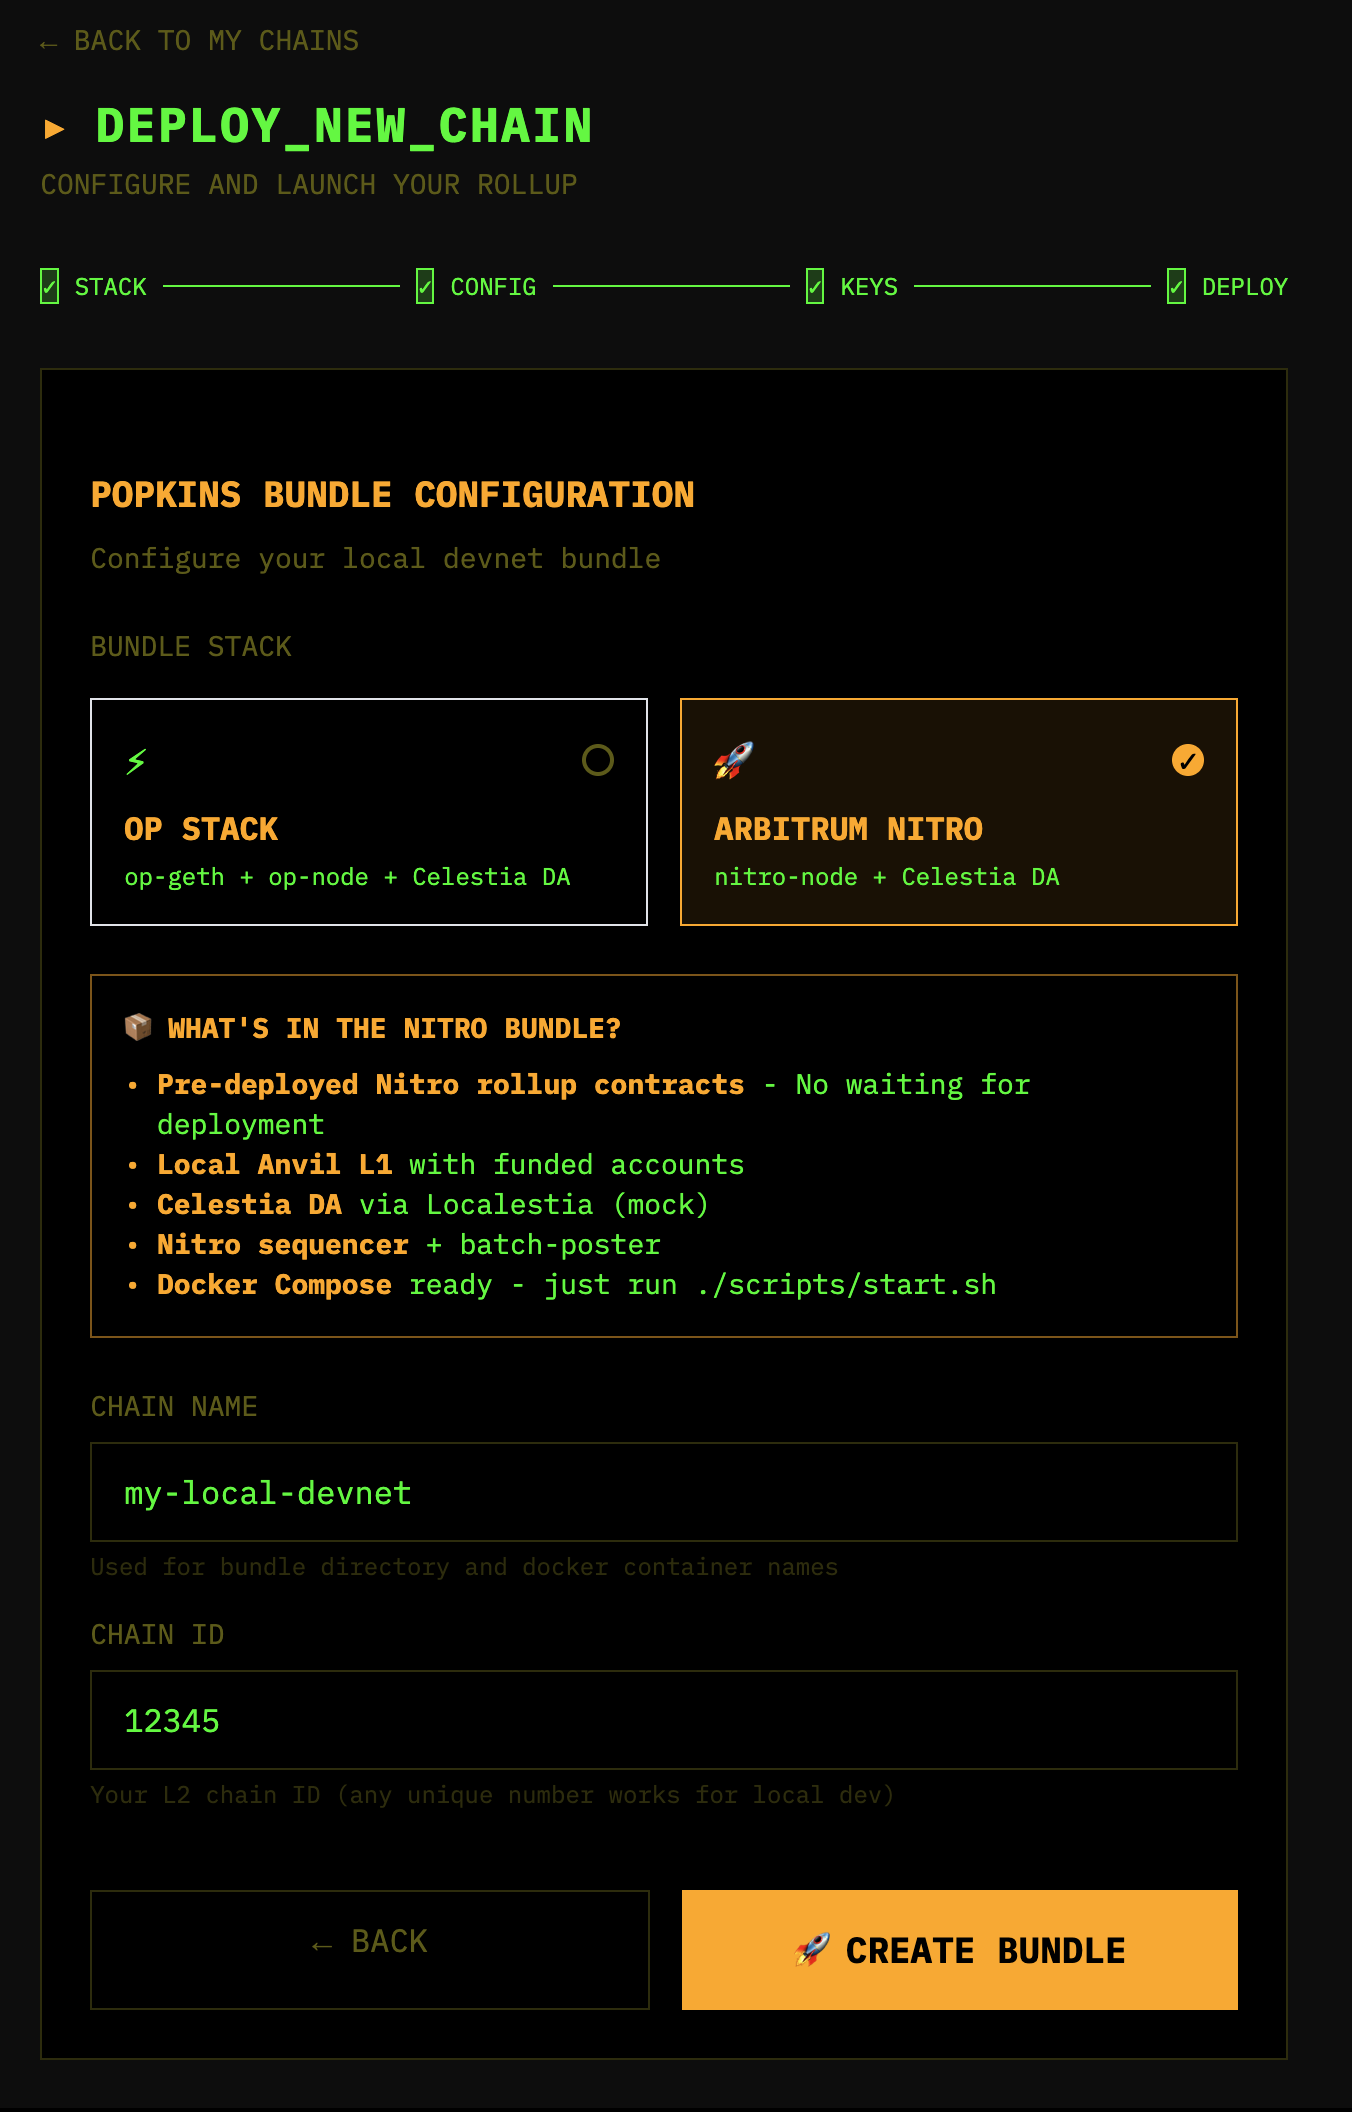
Pick stack
Then select “ARBITRUM NITRO”, put a chain name and chain ID into the fields, and click ”🚀 CREATE BUNDLE”.
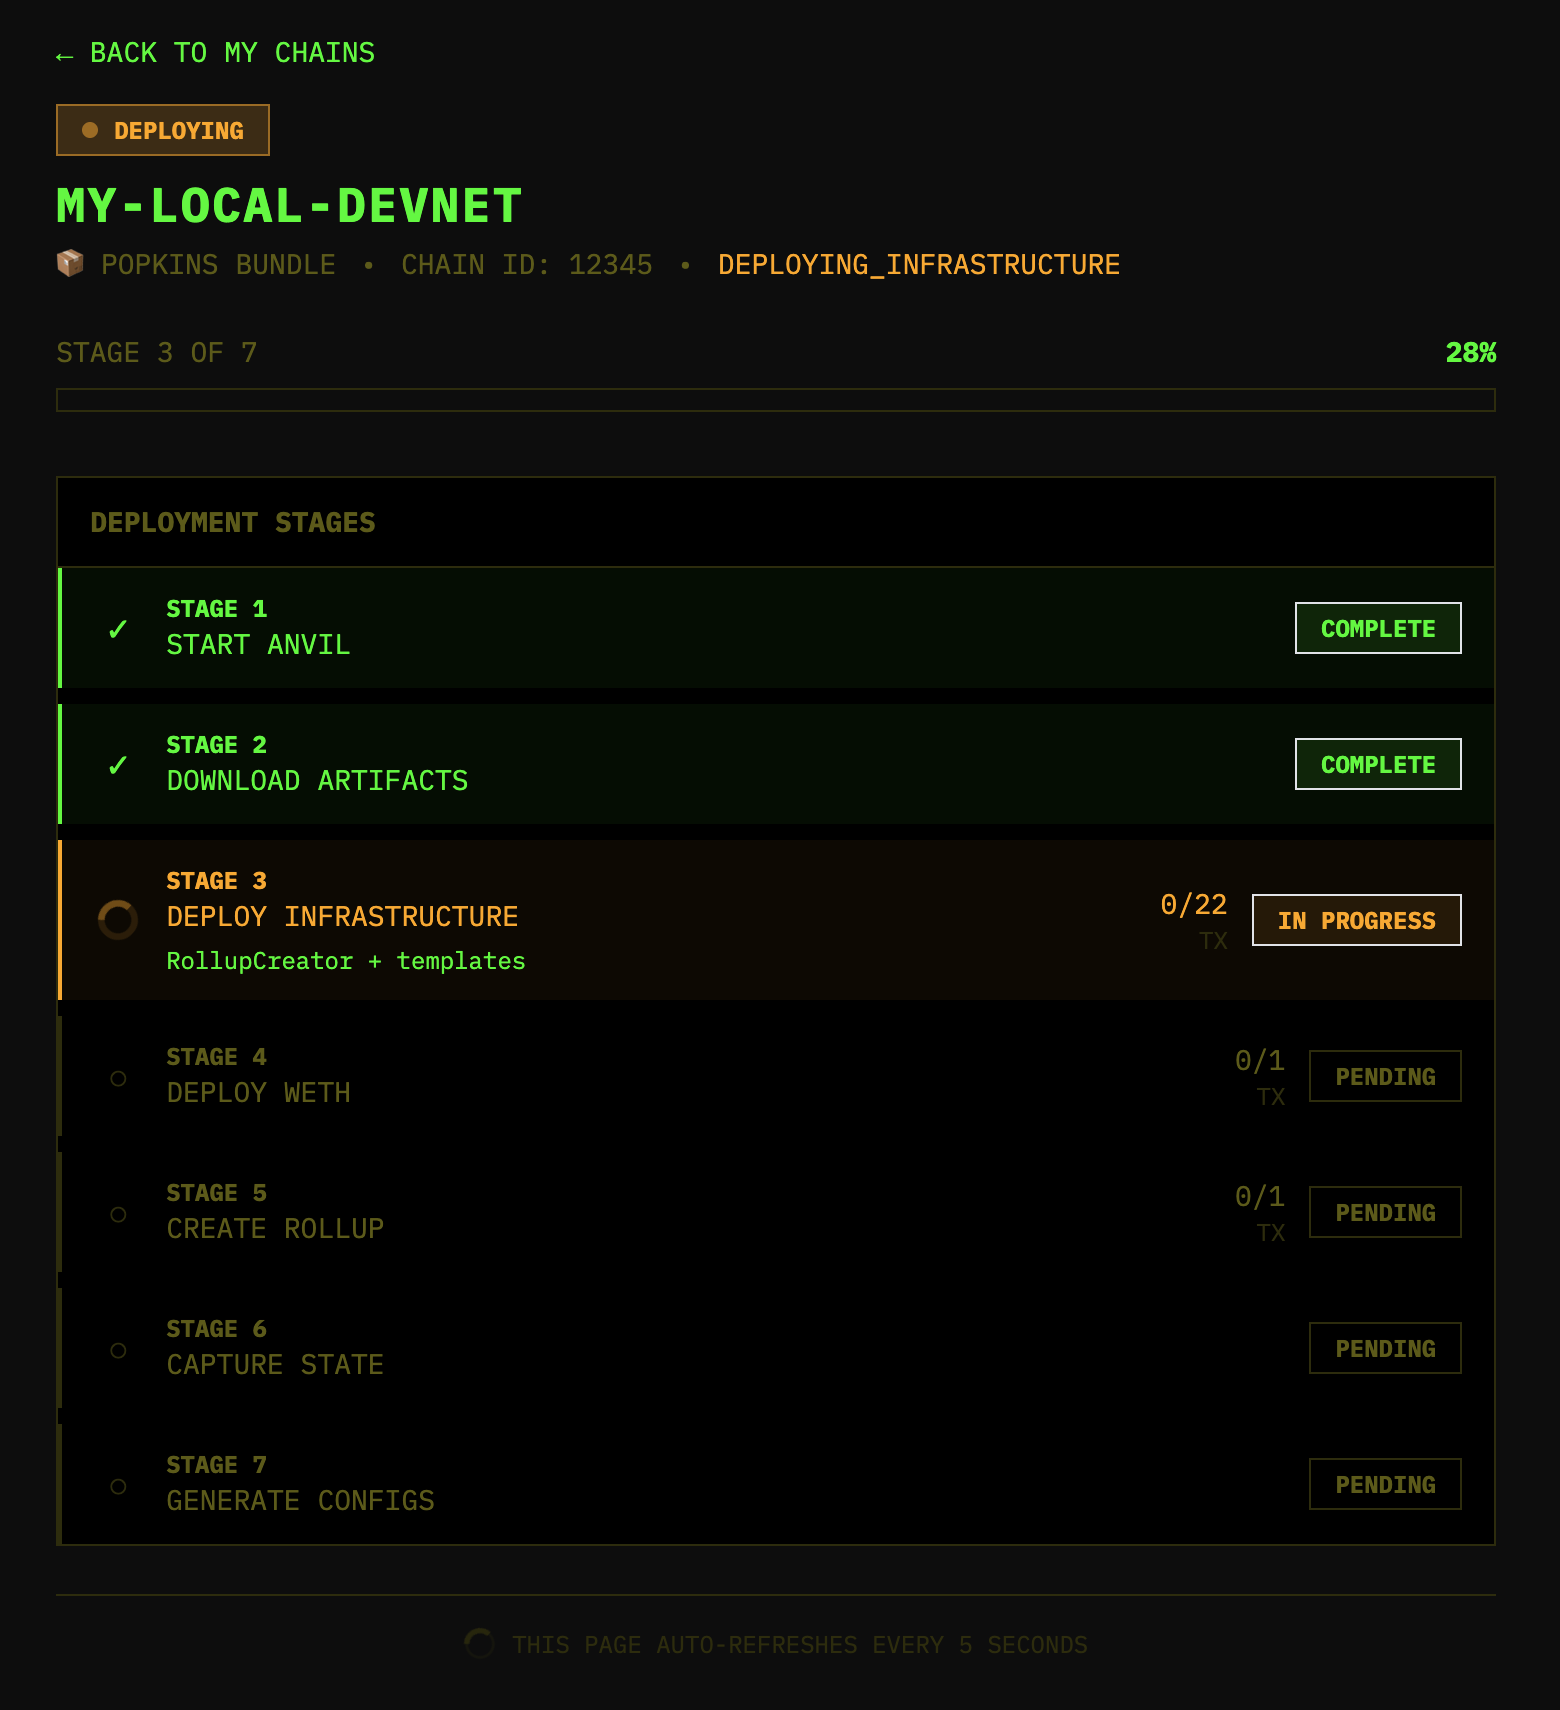
Wait for bundle generation
Wait for the bundle to be generated:
Review details
After it has generated, review the details:

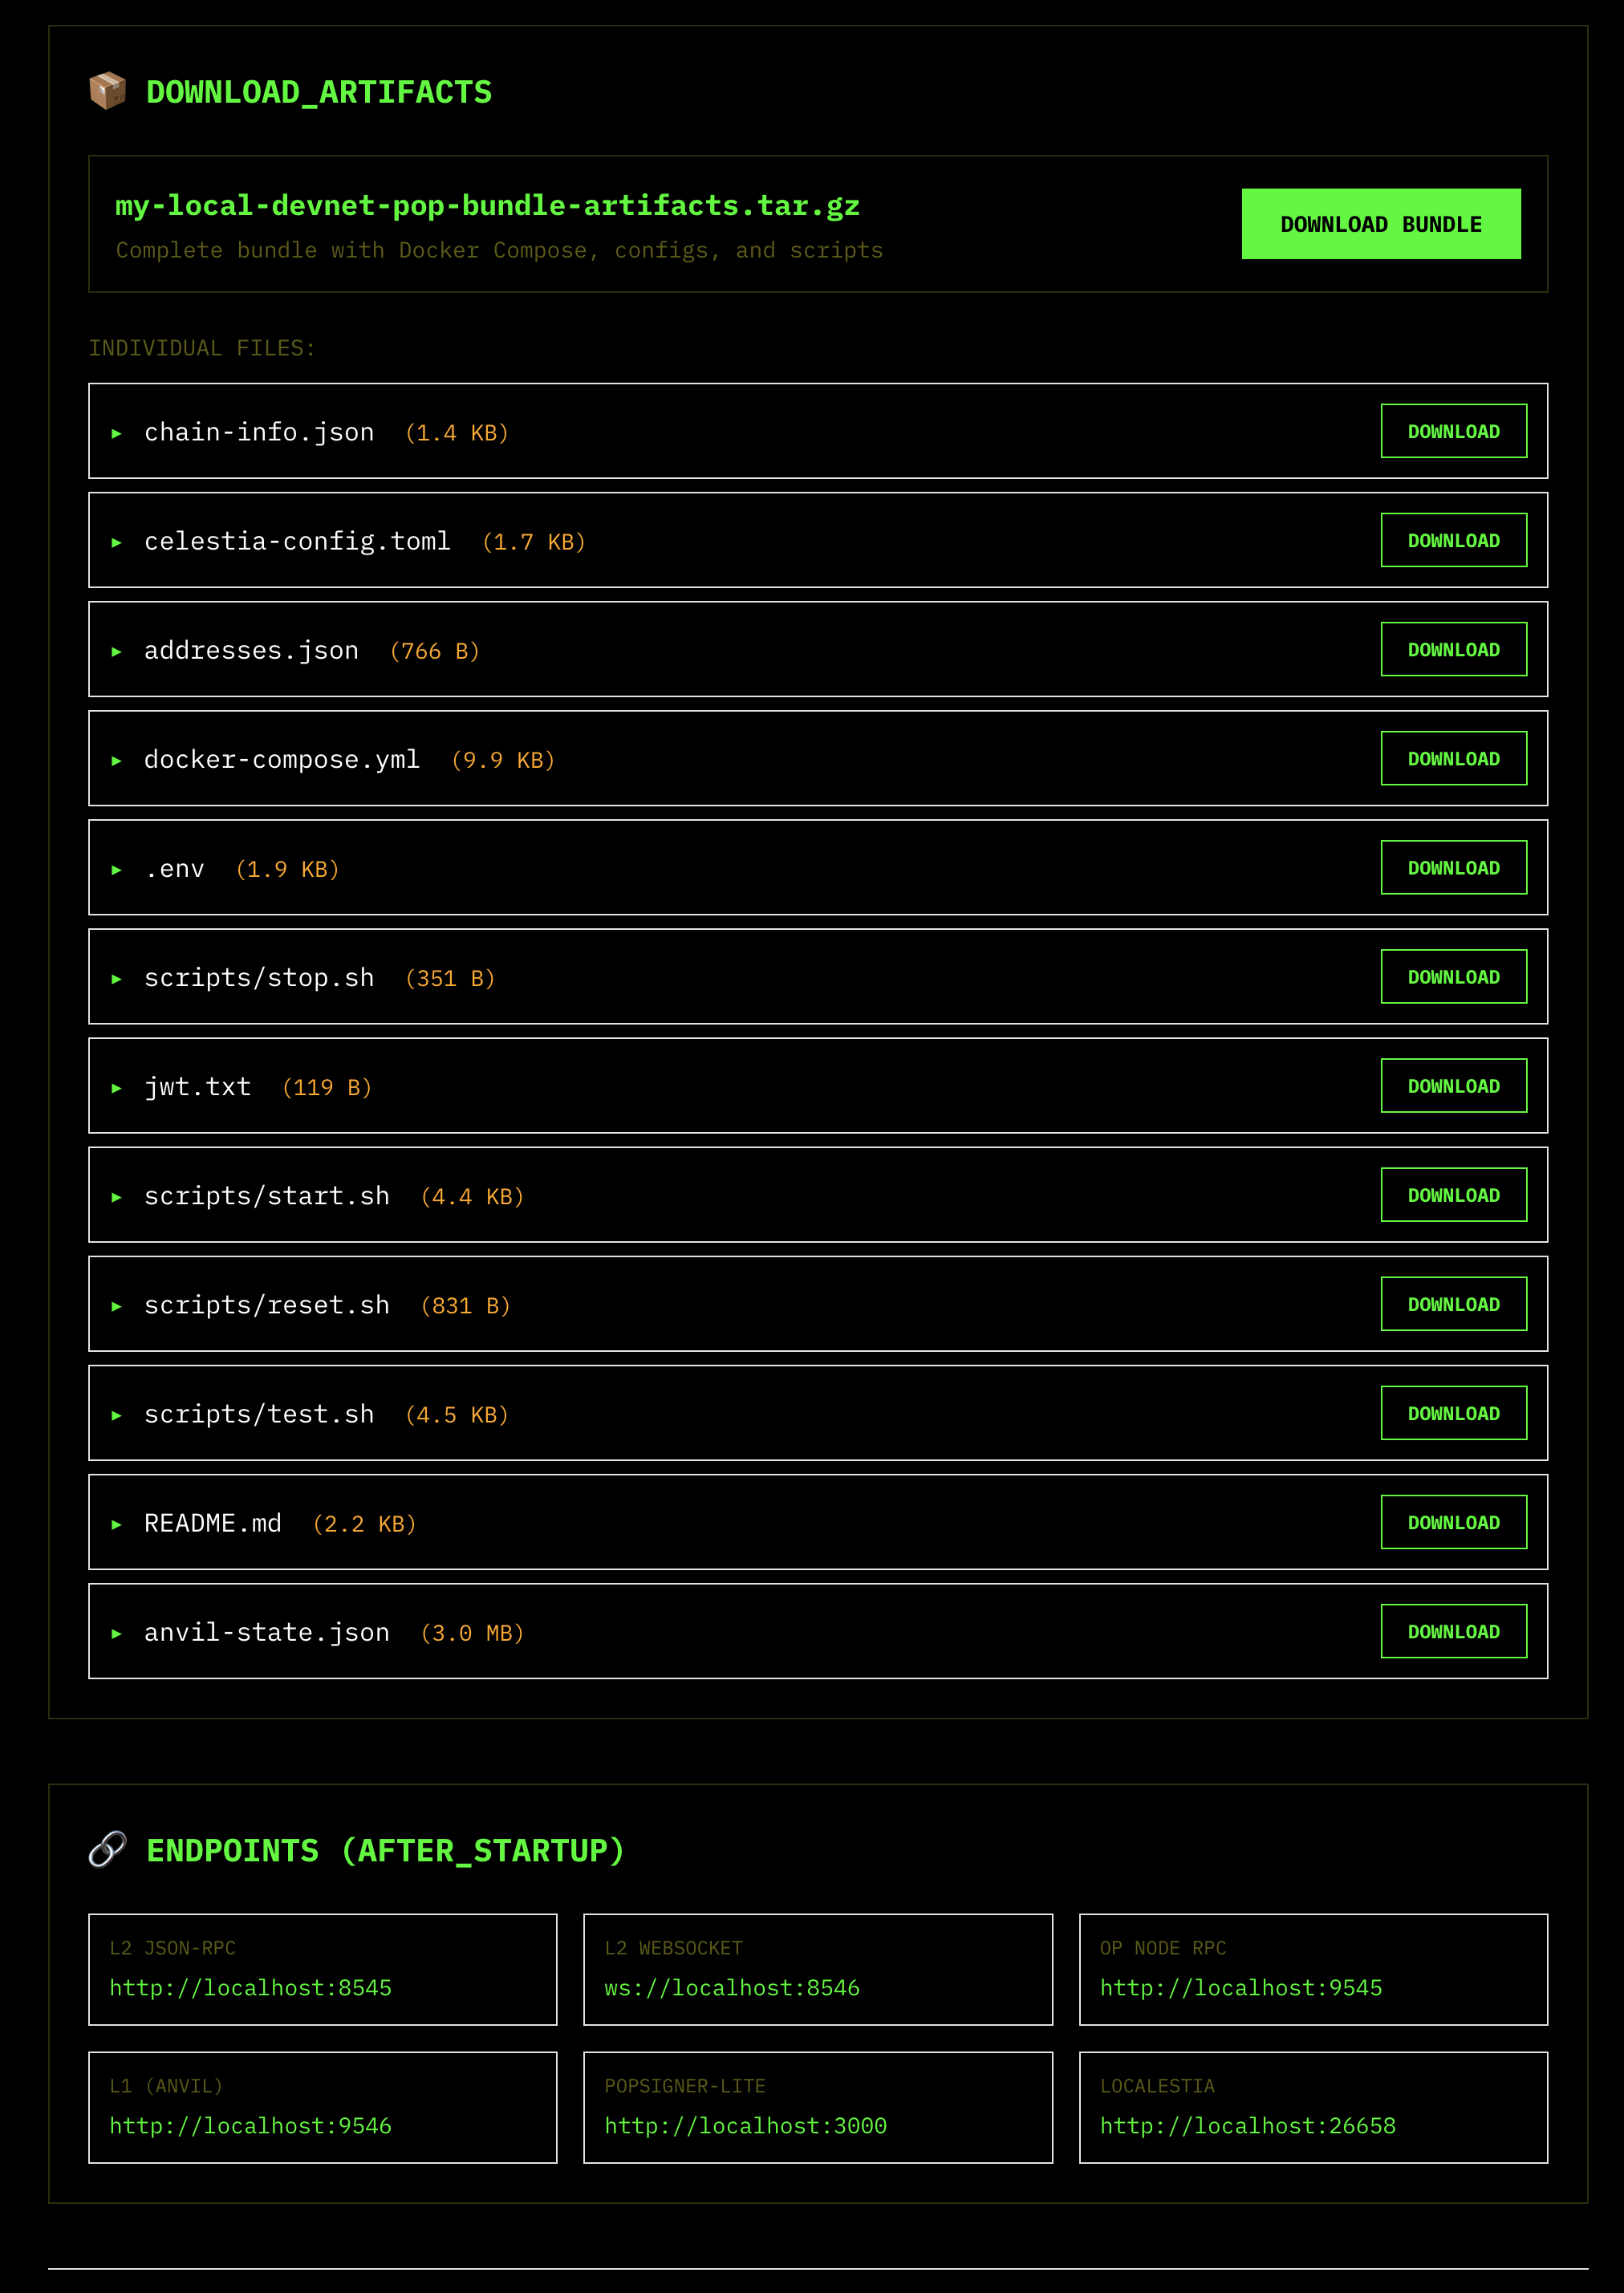
Download the bundle
Download the bundle by clicking the “DOWNLOAD BUNDLE” button.
Extract the tarball
Extract the tarball by running the following command:
unzip my-local-devnet-pop-bundle-artifacts.tar.gz
cd my-local-devnet-pop-bundle-artifacts
Run the bundle
Run the bundle by running the following command:
docker compose up -dOption 2: In the terminal
Clone Popsigner
git clone https://github.com/celestiaorg/popsigner.gitBuild the bundle generator
cd popsigner/control-plane/cmd/pop-deployer
go build -o pop-deployer .
Generate the pre-deployed bundle
./pop-deployer --stack nitroExtract and run
The bundle comes with all contracts already deployed and configured - just extract and run.
tar xzf nitro-local-devnet-bundle.tar.gz
./scripts/start.sh
Verify it’s running:
cast chain-id --rpc-url http://localhost:8547
# 42069
This starts the following services:
Services and ports
| Service | Port | Description |
|---|---|---|
| Anvil | 8545 (RPC) | L1 chain with pre-deployed Nitro contracts including: • RollupCreator - Factory for creating new rollups• Bridge - Cross-chain asset bridge• SequencerInbox - Receives L2 transactions• Outbox - Processes L2→L1 messages• Challenge manager & one-step provers for fraud proofs |
| Nitro Sequencer | 8547 (RPC) | L2 execution and sequencing node (nitro-node) that: • Processes transactions • Produces blocks • Manages state transitions • Handles deposits and withdrawals |
| Localestia | 26658 (Bridge API) | Mock Celestia DA layer providing: • Data availability for L2 batches • Blob storage and retrieval • DA attestations |
| POPSigner-Lite | Internal | Local signing service that: • Signs batch data for Celestia DA • Manages validator keys • Provides attestation signatures |
Default funded accounts (L1 only)
These are standard Anvil test accounts with publicly known private keys. NEVER use these on mainnet or testnets! They are only for local development.
The following accounts are pre-funded with 10,000 ETH on L1 only. You must bridge funds to L2 as shown in the examples below:
| Account | Address | Private Key (TEST ONLY) |
|---|---|---|
| Account #0 | 0xf39Fd6e51aad88F6F4ce6aB8827279cffFb92266 | 0xac0974bec39a17e36ba4a6b4d238ff944bacb478cbed5efcae784d7bf4f2ff80 |
| Account #1 | 0x70997970C51812dc3A010C7d01b50e0d17dc79C8 | 0x59c6995e998f97a5a0044966f0945389dc9e86dae88c7a8412f4603b6b78690d |
| Account #2 | 0x3C44CdDdB6a900fa2b585dd299e03d12FA4293BC | 0x5de4111afa1a4b94908f83103eb1f1706367c2e68ca870fc3fb9a804cdab365a |
| Account #3 | 0x90F79bf6EB2c4f870365E785982E1f101E93b906 | 0x7c852118294e51e653712a81e05800f419141751be58f605c371e15141b007a6 |
| Account #4 | 0x15d34AAf54267DB7D7c367839AAf71A00a2C6A65 | 0x47e179ec197488593b187f80a00eb0da91f1b9d0b13f8733639f19c30a34926a |
To use these accounts on L2, you must first bridge funds from L1 using the deposit function as shown in the “Fund your L2 account” step below.
These are the standard Anvil development accounts and are safe to use in documentation since they’re universally known test keys.
Congratulations! You’ve successfully deployed a Nitro local devnet.
Testing with a smart contract
Fund your L2 account
cast send 0x72d8D69ae87568ab98C2A652F7B8feE62fBB862b "depositEth()" \
  --value 1ether \
  --rpc-url http://localhost:8545 \
  --private-key 0xac0974bec39a17e36ba4a6b4d238ff944bacb478cbed5efcae784d7bf4f2ff80
Wait ~10 seconds for the deposit to process, then verify:
cast balance 0xf39Fd6e51aad88F6F4ce6aB8827279cffFb92266 --rpc-url http://localhost:8547Deploy a contract
rm -rf /tmp/counter && mkdir -p /tmp/counter && cd /tmp/counter
forge init
cat > src/Counter.sol << 'EOF'
// SPDX-License-Identifier: MIT
pragma solidity ^0.8.20;

contract Counter {
    uint256 public count;
    function increment() public { count += 1; }
}
EOF
forge create src/Counter.sol:Counter \
  --rpc-url http://localhost:8547 \
  --private-key 0xac0974bec39a17e36ba4a6b4d238ff944bacb478cbed5efcae784d7bf4f2ff80 \
  --broadcast
Interact with it
cast call 0x5FbDB2315678afecb367f032d93F642f64180aa3 "count()" --rpc-url http://localhost:8547cast send 0x5FbDB2315678afecb367f032d93F642f64180aa3 "increment()" \
--rpc-url http://localhost:8547 \
--private-key 0xac0974bec39a17e36ba4a6b4d238ff944bacb478cbed5efcae784d7bf4f2ff80cast call 0x5FbDB2315678afecb367f032d93F642f64180aa3 "count()" --rpc-url http://localhost:8547You’ve now deployed and interacted with a smart contract on your local Nitro devnet.